Hi guys,
Another month, another update.
I was not as active as I'd hope as far as sculpting goes, but I made some jumps.
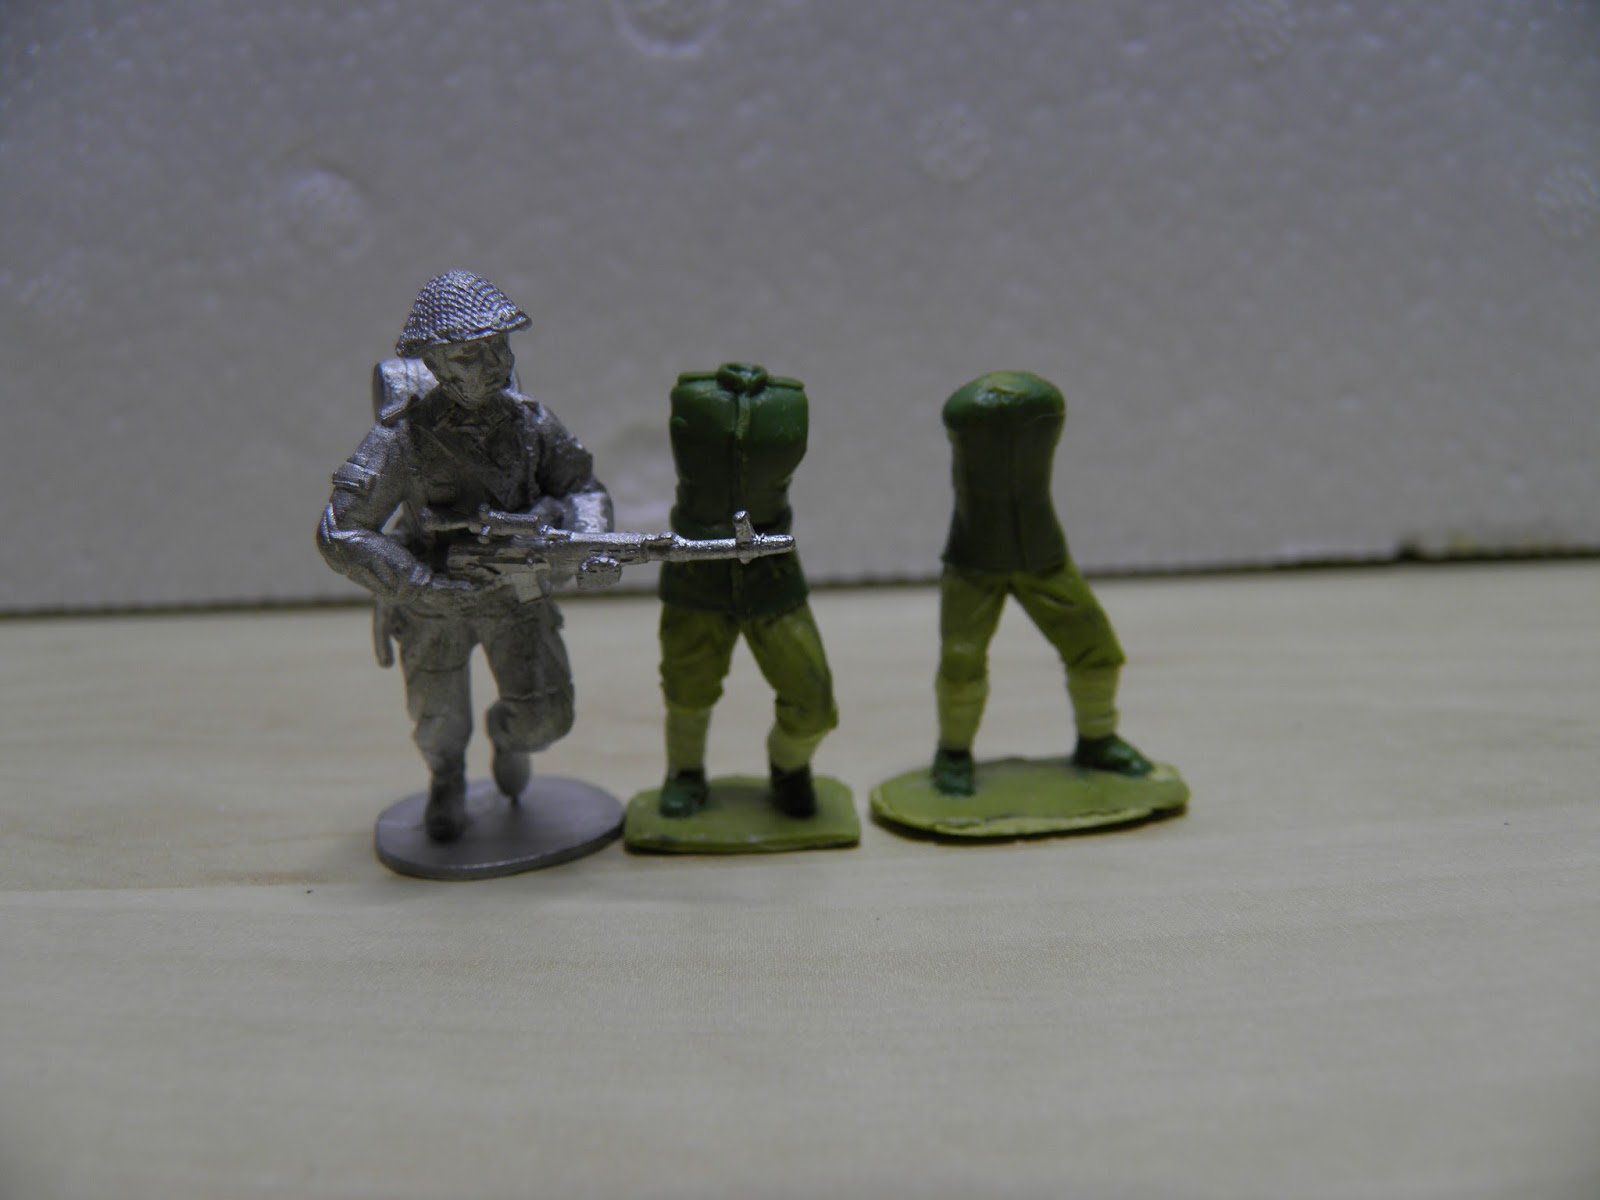
Firstly, I now have six initial dollies, with 3 more being sculpted that were not photographed.
You can see them below. A persistent tendency to make them smaller is rather obvious and it is something I just can not fix. I am not satisfied with them but rather than leaving them as they are, I will probably try to bulky them up eventually, so to at least get the proportions where I want them. It is not all bad, as I am quite satisfied with the puttees on the last three. This is something I was unable to duplicate on the three I am working on now, so they will be a step back.
Weapons are proceeding no better, I went to hunt for the just right thickness of wire and here, too I struggle as my rifles are too thin, too narrow and as far as the latest go - too short.
The hopefully recognisable machine gun on top, however, is a different story. It needs some cleaning up before I go on to details, but so far I am quite satisfied. It took me a while to find a store that carries brass tubes and then some more to return the optimistically 4mm wide one for 2.5.
As proportions follow the tube, I was able to make it bulkier. It's a bit 'heroic', but I quite like that and hope other equipment and miniatures will be able to follow.
In other news, my motivation for the project is slowly lower as the progress is slow, but I am just realising how better I feel now that I posted the progress and will hopefully be able to do so at least every other week.
Thanks for looking,
Math-yoo
Showing posts with label sculpting. Show all posts
13 Dec 2016
31 Oct 2016
WW1 project, update 2
Hi guys,
I have to admit I did not realise I haven't posted in almost a whole month - this is quite horrifying.
I can only apologise for the lack of presence on the blogosphere, I do actually look at a lot of blogs, but mostly fail to comment - and to write my own.
Interestingly, I was not passive in this time, as I kept sculpting the WW1 dollies. The progress was (and still is) slower than I'd like, as every time I hit an obstacle, I take a few days of 'rest'. I gave up on weapons momentarily, to focus on the dollies. The thing here is, weapons are eating up my nerves as I've must've started working on at least 7-8 rifles and I'm still not satisfied. Secondly, the more I work on the dollies the better I feel, as they start to resemble miniatures I want them to look like.
Some of the rifles below:
From bottom down: a ruler; two of the early ones; two of the 'these will be it' ones. There should be 4 but I lost 2 somehow (don't ask, I got no idea); lastly one that tries different approach and that proved to be too thick.
It was not all in vain, for I learned that 1:50 is too large and they need to be slightly smaller.
Since last time, I ditched the dollies without the cork and I dressed up the two I had on corks. Should you care - I decided they are not good enough and I am now using them to practice on the jackets.
I started working on a new trio of walking, bracing/semicrouching (?) and standing/firing rifle poses. As it takes time to get them from being a confusing wire to something odd to apparent legs, I didn't really feel like photographing or posting them.
Here they are, 2 out of 6 legs dressed up. They are the ones on the corks, while the older two sculpts are below them. Left, walking is supposedly Austrian and the right one is sorta-kinda-hopefully-eventually an Italian.
Close up on the two 'test pieces':
The photos below are as advanced as I've gotten so far. The legs are 'done' and after I add some bulk to their shoes, I will probably start working on another 3 poses. The idea is to have these legs cast in resin and use them to build up both Austrian and Italian uniforms out of them. That's why I won't be working on the torso.
Back photo here. It is amazing how hard it is to make folds look good.
Here is a close up on Austrian uniform. It lacks some medals (really), ammo pouches and that's about it. It also needs some clean up around the pockets and I will have to find a better way to do the characteristic flaps.
I've mad another face today, it still appears slightly too narrow. I am a horrible judge of scale and I can't really figure out what could I do to have it appear wider, but not larger.
Compared to UFM East German sniper. I suppose my miniature is '28mm to the eyes', which is a welcome surprise.
And again with the Italian uniform that unfortunately doesn't get as much attention as the other one.
That is pretty much it, if I'd really try, I should have another 3 sets of legs finished by mid month. I suppose it does get easier with time.
Lastly, you might have noticed (I know you didn't!), the photos are a lot brighter. That is because I am a proud owner of a new LED white light lamp. Not to brag, but as the luck would have it, the most affordable one (yup, the one I got, naturally) also had a magnifying glass installed. Now I can both not worry light will dry my paints and putty AND work after 6 pm!
Thanks for looking,
Mathyoo
I have to admit I did not realise I haven't posted in almost a whole month - this is quite horrifying.
I can only apologise for the lack of presence on the blogosphere, I do actually look at a lot of blogs, but mostly fail to comment - and to write my own.
Interestingly, I was not passive in this time, as I kept sculpting the WW1 dollies. The progress was (and still is) slower than I'd like, as every time I hit an obstacle, I take a few days of 'rest'. I gave up on weapons momentarily, to focus on the dollies. The thing here is, weapons are eating up my nerves as I've must've started working on at least 7-8 rifles and I'm still not satisfied. Secondly, the more I work on the dollies the better I feel, as they start to resemble miniatures I want them to look like.
Some of the rifles below:
From bottom down: a ruler; two of the early ones; two of the 'these will be it' ones. There should be 4 but I lost 2 somehow (don't ask, I got no idea); lastly one that tries different approach and that proved to be too thick.
It was not all in vain, for I learned that 1:50 is too large and they need to be slightly smaller.
Since last time, I ditched the dollies without the cork and I dressed up the two I had on corks. Should you care - I decided they are not good enough and I am now using them to practice on the jackets.
I started working on a new trio of walking, bracing/semicrouching (?) and standing/firing rifle poses. As it takes time to get them from being a confusing wire to something odd to apparent legs, I didn't really feel like photographing or posting them.
Here they are, 2 out of 6 legs dressed up. They are the ones on the corks, while the older two sculpts are below them. Left, walking is supposedly Austrian and the right one is sorta-kinda-hopefully-eventually an Italian.
Close up on the two 'test pieces':
The photos below are as advanced as I've gotten so far. The legs are 'done' and after I add some bulk to their shoes, I will probably start working on another 3 poses. The idea is to have these legs cast in resin and use them to build up both Austrian and Italian uniforms out of them. That's why I won't be working on the torso.
Back photo here. It is amazing how hard it is to make folds look good.
Here is a close up on Austrian uniform. It lacks some medals (really), ammo pouches and that's about it. It also needs some clean up around the pockets and I will have to find a better way to do the characteristic flaps.
I've mad another face today, it still appears slightly too narrow. I am a horrible judge of scale and I can't really figure out what could I do to have it appear wider, but not larger.
Compared to UFM East German sniper. I suppose my miniature is '28mm to the eyes', which is a welcome surprise.
And again with the Italian uniform that unfortunately doesn't get as much attention as the other one.
That is pretty much it, if I'd really try, I should have another 3 sets of legs finished by mid month. I suppose it does get easier with time.
Lastly, you might have noticed (I know you didn't!), the photos are a lot brighter. That is because I am a proud owner of a new LED white light lamp. Not to brag, but as the luck would have it, the most affordable one (yup, the one I got, naturally) also had a magnifying glass installed. Now I can both not worry light will dry my paints and putty AND work after 6 pm!
Thanks for looking,
Mathyoo
4 Oct 2016
WW1 Progress - No progress
Hello,
In the past weeks of radio silence project's momentum was lost by other more pressing matters - as one would expect. The plan is still alive and the time spent on hobby was spent doing some trial and error (by which I mean error).
I tried myself at all sorts of things, from faces, weapons to bodies themselves.
I sculpted 6 faces to go with my initial six dollies (that I have since quit working on). They are all a bit too small or at least too narrow - the second from the right being the only one I was satisfied with. And yes, it does look better in person!
The best face with UFM German below. Perhaps the size isn't that bad at all.
I also realised there is no chance I can sculpt shoes "in the air" and I needed a base to help me sculpt my miniatures from. This is the reason I quit working on the initial 6 dollies, but being raised to recycle, I will cut them slightly and repurpose them sooner or later.
I also decided 6 is an overkill while I am still finding myself, so I started working on two instead. I also decided to try and look up to Under Fire Miniatures' Germans instead of Great War Miniatures. I began to believe natural poses are what makes miniatures great (even if sculpting is sub par as in my cases), so this is what I am aiming for.
As you've probably noted so far, I took Ebob's advice and gave paper putties a try. I wasn't too convinced at first, but they give just the impression I want. Unfortunately, I am having huge trouble with consistency and only one leg out of 4 ended up as I imagined it.
The good leg up front, with the other being swollen:
And another view:
The other dolly has both of them awfully chunky. I was actually meaning to show them to you then cut them, but have instead decided to finish the dolly - it will be good practice and if miniature ever gets finished it will be fine for my purposes.
Both together, mind the leftmost leg is the one I am happy with.
What I will do with the next batches is keep the lower legs very slim, but slightly exaggerate the muscle and the curve of the bone when looking from the side. That should hopefully work.
You might notice I didn't talk about shoes at all. I can be brief here: not satisfied.
To keep me interested, I was jumping from one part of the project to another and started working on some weapons and equipment. The latter I didn't bother photographing as there's nothing to show, but here are my rifles.
Bottom up: First test short Austrian; First test long Austrian; Short Austrian; Long Austrian; Short Italian; Long Italian.
These are between 2 and 2.5 cm long. Carving is "easy" but I have no clue whatsoever how will I make short versions have the same stock as the longer. The best option would be having long versions cast and made smaller, but that's a task that can not really be done at this point.
They are now on stand by as I am gathering courage to work on them some more.
Sidearms I had more confidence doing as being 4-5mm long and being covered by the hands, they are essentially a rectangle for Austrian and a box for Italian. Should you care, left one is Steyr M1912 that looks (but doesn't really) like Colt pistol and the left one is Italian that should (but doesn't) look like an "Italian luger".
The problems encountered were all expected, so I am not too surprised and I indeed told myself I would sculpt 20 dollies to get 4 decent out if necessary, so I think its best to finish these and work on fixing mistakes with the next batch. I have a very old Miliput and GS to use anyway.
While sculpting prevents me from playtesting the rules, I can say there are nothing but good news in that department, as core mechanics are more or less all done and I am now working on some additional features.
Thanks for looking,
Mathyoo
In the past weeks of radio silence project's momentum was lost by other more pressing matters - as one would expect. The plan is still alive and the time spent on hobby was spent doing some trial and error (by which I mean error).
I tried myself at all sorts of things, from faces, weapons to bodies themselves.
I sculpted 6 faces to go with my initial six dollies (that I have since quit working on). They are all a bit too small or at least too narrow - the second from the right being the only one I was satisfied with. And yes, it does look better in person!
The best face with UFM German below. Perhaps the size isn't that bad at all.
I also realised there is no chance I can sculpt shoes "in the air" and I needed a base to help me sculpt my miniatures from. This is the reason I quit working on the initial 6 dollies, but being raised to recycle, I will cut them slightly and repurpose them sooner or later.
I also decided 6 is an overkill while I am still finding myself, so I started working on two instead. I also decided to try and look up to Under Fire Miniatures' Germans instead of Great War Miniatures. I began to believe natural poses are what makes miniatures great (even if sculpting is sub par as in my cases), so this is what I am aiming for.
As you've probably noted so far, I took Ebob's advice and gave paper putties a try. I wasn't too convinced at first, but they give just the impression I want. Unfortunately, I am having huge trouble with consistency and only one leg out of 4 ended up as I imagined it.
The good leg up front, with the other being swollen:
And another view:
The other dolly has both of them awfully chunky. I was actually meaning to show them to you then cut them, but have instead decided to finish the dolly - it will be good practice and if miniature ever gets finished it will be fine for my purposes.
Both together, mind the leftmost leg is the one I am happy with.
What I will do with the next batches is keep the lower legs very slim, but slightly exaggerate the muscle and the curve of the bone when looking from the side. That should hopefully work.
You might notice I didn't talk about shoes at all. I can be brief here: not satisfied.
To keep me interested, I was jumping from one part of the project to another and started working on some weapons and equipment. The latter I didn't bother photographing as there's nothing to show, but here are my rifles.
Bottom up: First test short Austrian; First test long Austrian; Short Austrian; Long Austrian; Short Italian; Long Italian.
These are between 2 and 2.5 cm long. Carving is "easy" but I have no clue whatsoever how will I make short versions have the same stock as the longer. The best option would be having long versions cast and made smaller, but that's a task that can not really be done at this point.
They are now on stand by as I am gathering courage to work on them some more.
Sidearms I had more confidence doing as being 4-5mm long and being covered by the hands, they are essentially a rectangle for Austrian and a box for Italian. Should you care, left one is Steyr M1912 that looks (but doesn't really) like Colt pistol and the left one is Italian that should (but doesn't) look like an "Italian luger".
The problems encountered were all expected, so I am not too surprised and I indeed told myself I would sculpt 20 dollies to get 4 decent out if necessary, so I think its best to finish these and work on fixing mistakes with the next batch. I have a very old Miliput and GS to use anyway.
While sculpting prevents me from playtesting the rules, I can say there are nothing but good news in that department, as core mechanics are more or less all done and I am now working on some additional features.
Thanks for looking,
Mathyoo
13 Sept 2016
WW1 project - expanded!
Hi guys,
The WW1 really sparked my interest and now I'm neck deep in the project - and already on the edge of desperation.
The rules I'm working on are slowly taking shape and I started looking out for suitable miniatures for Austrians and Italians (I am aiming for the time around 11th Battle of Isonzo, a prelude to the more famous 12th).
Long story short, I found there aren't any. Brigade Game has Italians and Austrians for 1915, which isn't good enough. Then there are Scarab games, which have lovely characterful miniatures, but I couldn't get myself to like the style (not the quality of the sculpts, that doesn't really bother me that much).
In the end I decided I could sculpt my own. Yes, again. Yes, from the scratch. I started gathering material, being very familiar with Austrians that part was easy. Italians less so, but I slowly gathered enough information to be able to put something together.
To help me with judging scale and style, I bought some Great War Miniatures Germans. While waiting for them to arrive, I was working on one of Ebob dollies I had laying around to give me some taste of what's to come:
The first lesson I learned was premade dollies are no good. They snap and this guy has wire for the arms, for example. His legs are held together by putty alone and I am afraid to touch it by now, as it's all woobly. The other lesson was I convinced myself this is something that could yield results.
By the time my GWM packs arrive, I had a helmet 3/4 done (it is supposed to be a Berndorfer, please). This is where I quit working on him, but I will be using left over putty to slowly have him finished for that 2 minutes rush of pride when a "project" is finished.
First thing I noticed when I got my GWM Germans was just how large they were. I hereby apologise for claiming Open Fire Cold War Germans were extraordinarily large. As it happens I just happen to have smaller miniatures in my collection!
Having made some rough measuring, I decided they are both more or less in 1/50 scale, which makes it easier to sculpt weapons to fit. I also noted that Open Fire are far better proportioned and more naturally posed (mind there's quite some years in between the two sculpts - I am not judging, merely comparing). If you stare at them long enough (as I did!), you can see how exaggerated the position of the legs are on the GW miniatures.
Secondly, they are both something like 6 heads tall (as opposed to natural 7-8) and GWM is a lot beefier. In a way, I prefer the GWM as they are easier to paint, but I found it hard to force myself exaggerate both the details and the poses, for better or worse.
Unrelated to sculpting preparations, I was otherwise disappointed in my GWM Germans. Sculpts are lovely and I would love to have more of them, but the casting was horrendous. Below, you can make out a large flash in the backpack-helmet-rifle triangle. That's just one of many simpler examples.
Secondly, look at the legs on this one. Firstly, notice the best putties I've seen (I told you I stared at a lot of miniatures), they are made to look as if they cover each other. Exaggerated, yes, but they look fantastic. And then notice the cut in the knee, just below yet another piece of flash. I think this could be due to fact the moulds are old and worn out. It was a bit of a joy killer, however, and they probably won't see their turn to be painted any time soon.
Anyways, using some of the poses as an inspiration, I started twisting the wire. I consulted my charts carefully and did my best to measure them. This is the point where I learned that you can not use (3 years old) milliput, as it cracks. What helps is to mix it with some GS, making it rock solid, yet slightly flexible.
I made 6 poses out of wire, 3 of them looking something like these:
Now, full disclosure, this is the point where I died a bit inside, feeling I'll never make it. The wires just didn't seem right, something was off and I couldn't figure out what would it be. I am fully aware I need to practice, but looking at that wires made it seem as a bridge too far.
Anyway, I pushed on and started bulking out the legs. It is amazing how much better I felt after I've put some muscle on the wire and just as fast as I'd give up, I was full of optimism again.
Having three done, I decided I would only work on 3 at a time at most, anything else is already a burden. And even here one tends to be left out in favour of other two.
For only a short try, I started working from bottom up. Not using corks that would give me a solid base, I found shoes very hard to do and rather moved on to puttees. The idea is to work from puttees up and if that doesn't quite work, to bulk out the tights first and then work down with a good support.
I started working out how to make puttees. I can not imagine the greenstuff being rolled around a leg as a real puttee, and I generally came up with two ideas. On the photos below, leftmost example is the first one. I simply wrapped the GS around and indicated puttee with a knife.
It doesn't follow any patterns, but the notches are subtle enough to give what I believe to be a good impression (it honestly looks better in person). It is hard to get a knife all around to dent it, but it looks great from a bit further away.
Other examples were done by twisting a thread around the leg, which both gives a clear indication of a puttee being rolled up, and also looks somehow wrong.
I am thinking what I should do is use GS-milliput mix for a harder putty, so that threat can't cut too far inside and then figure a way for a slightly more consistent rolls. As you can see on the rightmost example, I left far too much space in between the turns, making it awful. Harder putty could also simply be sanded where it would bulge.
While I try to do something every day, I found myself very busy elsewhere just in the time I started working on these! Keeping it fun, I do try to do little at once to make sure I don't start hating them. I plan on working on these 3 up to a certain level and treat them as a practice, hoping the next 3 might fare a bit better. And then 3 after them should hopefully be reasonable and if all is right, I might be satisfied with the 3 after those. Or that's the plan at least.
As usual, thanks for looking, any comments or ideas would be most welcomed!
Mathyoo
The WW1 really sparked my interest and now I'm neck deep in the project - and already on the edge of desperation.
The rules I'm working on are slowly taking shape and I started looking out for suitable miniatures for Austrians and Italians (I am aiming for the time around 11th Battle of Isonzo, a prelude to the more famous 12th).
Long story short, I found there aren't any. Brigade Game has Italians and Austrians for 1915, which isn't good enough. Then there are Scarab games, which have lovely characterful miniatures, but I couldn't get myself to like the style (not the quality of the sculpts, that doesn't really bother me that much).
In the end I decided I could sculpt my own. Yes, again. Yes, from the scratch. I started gathering material, being very familiar with Austrians that part was easy. Italians less so, but I slowly gathered enough information to be able to put something together.
To help me with judging scale and style, I bought some Great War Miniatures Germans. While waiting for them to arrive, I was working on one of Ebob dollies I had laying around to give me some taste of what's to come:
The first lesson I learned was premade dollies are no good. They snap and this guy has wire for the arms, for example. His legs are held together by putty alone and I am afraid to touch it by now, as it's all woobly. The other lesson was I convinced myself this is something that could yield results.
By the time my GWM packs arrive, I had a helmet 3/4 done (it is supposed to be a Berndorfer, please). This is where I quit working on him, but I will be using left over putty to slowly have him finished for that 2 minutes rush of pride when a "project" is finished.
First thing I noticed when I got my GWM Germans was just how large they were. I hereby apologise for claiming Open Fire Cold War Germans were extraordinarily large. As it happens I just happen to have smaller miniatures in my collection!
Having made some rough measuring, I decided they are both more or less in 1/50 scale, which makes it easier to sculpt weapons to fit. I also noted that Open Fire are far better proportioned and more naturally posed (mind there's quite some years in between the two sculpts - I am not judging, merely comparing). If you stare at them long enough (as I did!), you can see how exaggerated the position of the legs are on the GW miniatures.
Secondly, they are both something like 6 heads tall (as opposed to natural 7-8) and GWM is a lot beefier. In a way, I prefer the GWM as they are easier to paint, but I found it hard to force myself exaggerate both the details and the poses, for better or worse.
Unrelated to sculpting preparations, I was otherwise disappointed in my GWM Germans. Sculpts are lovely and I would love to have more of them, but the casting was horrendous. Below, you can make out a large flash in the backpack-helmet-rifle triangle. That's just one of many simpler examples.
Secondly, look at the legs on this one. Firstly, notice the best putties I've seen (I told you I stared at a lot of miniatures), they are made to look as if they cover each other. Exaggerated, yes, but they look fantastic. And then notice the cut in the knee, just below yet another piece of flash. I think this could be due to fact the moulds are old and worn out. It was a bit of a joy killer, however, and they probably won't see their turn to be painted any time soon.
Anyways, using some of the poses as an inspiration, I started twisting the wire. I consulted my charts carefully and did my best to measure them. This is the point where I learned that you can not use (3 years old) milliput, as it cracks. What helps is to mix it with some GS, making it rock solid, yet slightly flexible.
I made 6 poses out of wire, 3 of them looking something like these:
Now, full disclosure, this is the point where I died a bit inside, feeling I'll never make it. The wires just didn't seem right, something was off and I couldn't figure out what would it be. I am fully aware I need to practice, but looking at that wires made it seem as a bridge too far.
Anyway, I pushed on and started bulking out the legs. It is amazing how much better I felt after I've put some muscle on the wire and just as fast as I'd give up, I was full of optimism again.
Having three done, I decided I would only work on 3 at a time at most, anything else is already a burden. And even here one tends to be left out in favour of other two.
For only a short try, I started working from bottom up. Not using corks that would give me a solid base, I found shoes very hard to do and rather moved on to puttees. The idea is to work from puttees up and if that doesn't quite work, to bulk out the tights first and then work down with a good support.
I started working out how to make puttees. I can not imagine the greenstuff being rolled around a leg as a real puttee, and I generally came up with two ideas. On the photos below, leftmost example is the first one. I simply wrapped the GS around and indicated puttee with a knife.
Other examples were done by twisting a thread around the leg, which both gives a clear indication of a puttee being rolled up, and also looks somehow wrong.
I am thinking what I should do is use GS-milliput mix for a harder putty, so that threat can't cut too far inside and then figure a way for a slightly more consistent rolls. As you can see on the rightmost example, I left far too much space in between the turns, making it awful. Harder putty could also simply be sanded where it would bulge.
While I try to do something every day, I found myself very busy elsewhere just in the time I started working on these! Keeping it fun, I do try to do little at once to make sure I don't start hating them. I plan on working on these 3 up to a certain level and treat them as a practice, hoping the next 3 might fare a bit better. And then 3 after them should hopefully be reasonable and if all is right, I might be satisfied with the 3 after those. Or that's the plan at least.
As usual, thanks for looking, any comments or ideas would be most welcomed!
Mathyoo
19 May 2016
War Correspondent and Interpreter
Hi guys,
Hobby is still slow here, the solo gaming just does not seem to cut it for me. Bunker is progressing slowly after the initial enthusiasm, but an unforseen surge of modelling made me finish yet another two recycled projects.
The War Correspondent and Interpreter miniatures you are about to see both started years ago (literally) when I started working on Slovene soldiers for the first time. The latter have since been replaced with the fantastic Empress Americans, which I think was great choice as it let me finish a lot of them reasonably fast.
Still, I was left with 4 half done dollies and I used two of them to make the miniatures I wanted for a long time - interpreter and a journalist.
Below you can see them at the stage where I essentially gave up on trying to make them look any better:
The 'terp on the left looks a lot like what my Slovenes would have looked like if they were ever finished, including the 'old' helmet cover with loads of camo stripes. He was given a walkie and a single pouch. I thought about giving him an AK and eventually settled for an unarmed version.
The correspondent was given a plain helmet (that would need slight beefing up, they both use same heads actually!), slightly different vest and a small one-hand camera. The first idea was to give him a large camera, because they 'look cool', but that would have involved a lot of work and I think someone embedded with a fighting unit would appreciate the flexibility of a lighter equipment. He was given a satchel and yet another camera, however.
The interpreter was painted in a mix of camo and plain greens to keep him interesting. I've hid his identity behind a ski-mask and gave him tacticool gloves. While my painting efforts have lowered somehow in the past year, I think it looks quite fantastic.
Here he is compared to an Empress US soldier, as you can see he is slightly smaller, as dollies are older, when 28mm was 28mm.
The War Correspondent was given more civilian clothing. Green helmet was justified as a military surplus. I was not sure about vest colour, I vividly remember reading how blue vests were only good for snipers to shoot at the journalists in Bosnia. But apparently they are still in use, and if nothing else, it helps with a recognition of the miniature.
There is not much to add, below is a size comparison photo. It was made using same E-bob dollies as the Interpreter, so there are next to no differences - keep in mind, however, that I 'grew' both of them for a milimeter or so by adding putty to their shoulders back when I started making Slovenes.
As usual,
Thanks for looking!
Mathyoo
Hobby is still slow here, the solo gaming just does not seem to cut it for me. Bunker is progressing slowly after the initial enthusiasm, but an unforseen surge of modelling made me finish yet another two recycled projects.
The War Correspondent and Interpreter miniatures you are about to see both started years ago (literally) when I started working on Slovene soldiers for the first time. The latter have since been replaced with the fantastic Empress Americans, which I think was great choice as it let me finish a lot of them reasonably fast.
Still, I was left with 4 half done dollies and I used two of them to make the miniatures I wanted for a long time - interpreter and a journalist.
Below you can see them at the stage where I essentially gave up on trying to make them look any better:
The 'terp on the left looks a lot like what my Slovenes would have looked like if they were ever finished, including the 'old' helmet cover with loads of camo stripes. He was given a walkie and a single pouch. I thought about giving him an AK and eventually settled for an unarmed version.
The correspondent was given a plain helmet (that would need slight beefing up, they both use same heads actually!), slightly different vest and a small one-hand camera. The first idea was to give him a large camera, because they 'look cool', but that would have involved a lot of work and I think someone embedded with a fighting unit would appreciate the flexibility of a lighter equipment. He was given a satchel and yet another camera, however.
The interpreter was painted in a mix of camo and plain greens to keep him interesting. I've hid his identity behind a ski-mask and gave him tacticool gloves. While my painting efforts have lowered somehow in the past year, I think it looks quite fantastic.
Here he is compared to an Empress US soldier, as you can see he is slightly smaller, as dollies are older, when 28mm was 28mm.
The War Correspondent was given more civilian clothing. Green helmet was justified as a military surplus. I was not sure about vest colour, I vividly remember reading how blue vests were only good for snipers to shoot at the journalists in Bosnia. But apparently they are still in use, and if nothing else, it helps with a recognition of the miniature.
There is not much to add, below is a size comparison photo. It was made using same E-bob dollies as the Interpreter, so there are next to no differences - keep in mind, however, that I 'grew' both of them for a milimeter or so by adding putty to their shoulders back when I started making Slovenes.
As usual,
Thanks for looking!
Mathyoo
3 May 2015
Technicals - part 1
Hello guys,
Before I start, I have to apologise yet again for the lack of activity and for missing so many of your blog posts. I am working on something else at the moment and the days often pass so fast I completely forget about the hobby. I will try to do better in the following week and check on some of the things I've missed!
When I was in London in March I scored a good day in Poundland and bought three police pickups for a pound!
They are horrible, but at 33,334 pence a piece, they will be just fine. I was desperate for some to give my insurgents much needed vehicle support.
I have no plan as to how I want them to look (except one MIGHT be up armoured and both would probably have machine guns), so I will see how they turn out as they go. I do not want them armed with an AA guns as my games are all up close and personal and those mounts would need some kind of minimum range as the gun is mean to be firing in the skies.
First thing I needed done was clear the stickers and it was a real pain. I tried all sorts of things and glue residue wouldn't come off. In the end, I covered it in dirt and then used an eraser to help me clean it - that worked really well.
As they come without windows and I didn't want to go through the trouble of converting and painting drivers, I decided to make glass. It was a pretty easy work, measured by the eyes. I glued plasticard on with superglue and then I sealed it with an old greenstuff that I can't use for my miniatures anymore.
Don't hold your breath for the next step (I've built those 2 weeks ago and still nothing was added!), but in the mean time, feel free to suggest the weaponry. I was thinking giving them two machine guns of some sorts (One medium as I have a model and one heavy that I could sculpt), to make them even with my Hummvees, but some sort of cannon would also look good on them!
Thanks for looking,
Mathyoo
Before I start, I have to apologise yet again for the lack of activity and for missing so many of your blog posts. I am working on something else at the moment and the days often pass so fast I completely forget about the hobby. I will try to do better in the following week and check on some of the things I've missed!
When I was in London in March I scored a good day in Poundland and bought three police pickups for a pound!
They are horrible, but at 33,334 pence a piece, they will be just fine. I was desperate for some to give my insurgents much needed vehicle support.
I have no plan as to how I want them to look (except one MIGHT be up armoured and both would probably have machine guns), so I will see how they turn out as they go. I do not want them armed with an AA guns as my games are all up close and personal and those mounts would need some kind of minimum range as the gun is mean to be firing in the skies.
First thing I needed done was clear the stickers and it was a real pain. I tried all sorts of things and glue residue wouldn't come off. In the end, I covered it in dirt and then used an eraser to help me clean it - that worked really well.
As they come without windows and I didn't want to go through the trouble of converting and painting drivers, I decided to make glass. It was a pretty easy work, measured by the eyes. I glued plasticard on with superglue and then I sealed it with an old greenstuff that I can't use for my miniatures anymore.
Don't hold your breath for the next step (I've built those 2 weeks ago and still nothing was added!), but in the mean time, feel free to suggest the weaponry. I was thinking giving them two machine guns of some sorts (One medium as I have a model and one heavy that I could sculpt), to make them even with my Hummvees, but some sort of cannon would also look good on them!
Thanks for looking,
Mathyoo
4 Jul 2014
Working on the guns
Hello guys,
Before I start with the main topic of today's post, I would like to thank each and everyone of you who have helped this blog get 50,000 hits. I am trying to make my posts interesting and at least somewhat hobby related even when I don't have much to show you. Your comments are always appreciated as they are an inspiration and a push force for my projects. Thank you!
This Tuesday, a long anticipated mail finally arrived all the way from the remote Scottish highlands!
Mail was from one Hunterpest, an owner and a man behind Project Zeke miniatures (alternatively, click the banner on the left ->).
You should also check his blog, HERE. He very kindly agreed to put my F2000S and minimi (based on AUG and minimi made by and with permission from E-bob) in his mould while he was casting his own miniatures.
I got to say they look much better in person. I am really happy with the rifles, but they should be a tiny tad higher up front I think. My work on the minimi is limited to a modified ammo pouch, optics and horrible stock.
I will use these "version 1" rifle as a basis for (you guessed it!) "version 2" variants. Those will include the three basic versions used by Slovenian Armed Forces: standard with red dot, standard with UGL and one with magnifying optics.
Below are the greens. In process of mould making, the temperatures and pressures are high, so they come out burnt. This is why plasticard doesn't work with metal castings, unless you'd cast them in resin first. As you can see the gun surivived the trial, but minimi's stock broke (like countless times before I even gave up and called it finished). I have to admit I am disappointed in myself for not persisting as every little mistake is noticeable on the casts.
I grabbed one of the Empress M4's for a size comparison. Judging by THIS photo, the length seems fine, even if F2000S seems really tiny. It could use a liiiiittle more height, but certainly not over 0.25-0.5 mm, which is just too little to bother.
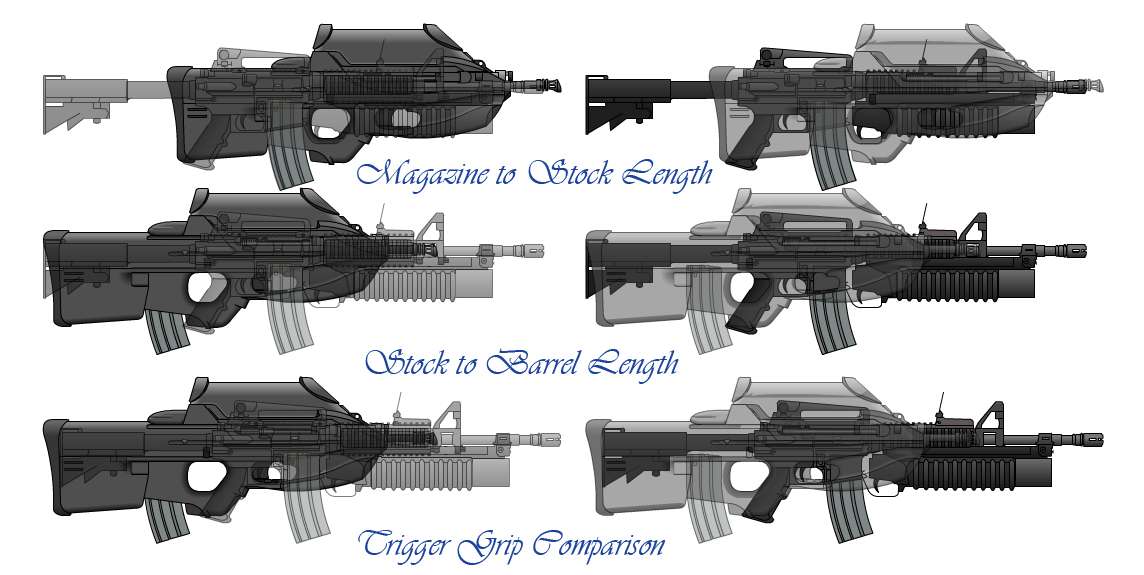
I am pretty sure I mentioned this before, but the difference between the standard FN F2000 (the one you see in computer games) and Slovene FN F2000S(lovenia) is in the rail for optics. Original gun has (when you take that oversized box off) a plastic rail that is fitted straight on the gun, while "our" version has a steel rail that is a bit rised, to allow space for a carrying handle. I have "intended" this handle on my sculpts, but it is so tiny it's barely noticeable. There are also some inside differences, but those don't really apply to our hobby.
First thing I did was clean the sculpts in warm soapy water as I
mentally prepared for the surgery. Then I cleaned any traces of mould
lines and "sprue" on the weapons. I also cut the left over wire, which
was left there intentionally so the thing wouldn't break up for the
millionth time. While doing all this, I was trying to figure out what
bothers me with the general shape of the gun. And I know. It has a tad
too low profile. We're talking about less than half a millimeter, but
it's there and I am trying not to be bothered by such a minor thing.
I also filled and tried to thin the flash guard a bit...I can't really reproduce the shape of the original, but it doesn't have to that thick, either.
I found an aimpoint armed US soldier in my EOD disposal team pack from Empress, so I had an idea of what I'd like to make:
I used the premade "optics buldge" and wrapped some GS around it. At one point I stuck a piece of wire half way in to get that tiny tube where batteries are stored. I also pushed some putty around to make sure the front half of the optics was a bit thicker than the rest. It didn't came out as nice as the Empress one, but I think it gives away the intention.
Trijicon was a bit more complex. The one you see below got scraped and I gave it another try.
Here you can see the second try. It's not the best representative, but the identifying feature of the optics is it's conical shape and not the adjustment buttons. It's hard to find the balance between the realistic details and an interesting model and it's something I'd need much more practice to find the balance at.
I made a Trijicon version and three red dot versions. One will be as it is, one will get a grenade launcher attached and the third is for my test miniature I am working on (more on that at a later date!). To avoid sculpting 20 optics, the bulk of my forces will be converted once I get those "updated" versions cast.
It has dawned to me I probably talked more than it was necessary in this post again, so I apologise for another lengthy post, but at least I have included lots of photos!
For a conclusion of today's post, I figured I would show you a size comparison photo. Below is an F2000S, British Sa80 (some 10 cm longer than F2000 IRL), M16 (around 30 cm longer IRL), Ultima ratio commando sniper rifle I am making (as usual, I hit a brick wall at the scope) and lastly a RGW90 disposable anti tank weapon. This one was finished before but I cut some of it off as it was too long. It should be as long as M16 IRL, so as you can see, I messed it up a bit.
And a shot of first try sniper rifle (lower one) and the new one. I am pretty certain starting over was a good idea as that rifle was just too tiny.
I also apologise for shameless advertisement, but I think this is the least I can do for the great guys of afore mentioned sculptors. This project would never come to a stage it is now if it weren't for their help.
Thanks for looking,
Mathyoo
Before I start with the main topic of today's post, I would like to thank each and everyone of you who have helped this blog get 50,000 hits. I am trying to make my posts interesting and at least somewhat hobby related even when I don't have much to show you. Your comments are always appreciated as they are an inspiration and a push force for my projects. Thank you!
This Tuesday, a long anticipated mail finally arrived all the way from the remote Scottish highlands!
Mail was from one Hunterpest, an owner and a man behind Project Zeke miniatures (alternatively, click the banner on the left ->).
You should also check his blog, HERE. He very kindly agreed to put my F2000S and minimi (based on AUG and minimi made by and with permission from E-bob) in his mould while he was casting his own miniatures.
I got to say they look much better in person. I am really happy with the rifles, but they should be a tiny tad higher up front I think. My work on the minimi is limited to a modified ammo pouch, optics and horrible stock.
I will use these "version 1" rifle as a basis for (you guessed it!) "version 2" variants. Those will include the three basic versions used by Slovenian Armed Forces: standard with red dot, standard with UGL and one with magnifying optics.
Below are the greens. In process of mould making, the temperatures and pressures are high, so they come out burnt. This is why plasticard doesn't work with metal castings, unless you'd cast them in resin first. As you can see the gun surivived the trial, but minimi's stock broke (like countless times before I even gave up and called it finished). I have to admit I am disappointed in myself for not persisting as every little mistake is noticeable on the casts.
I grabbed one of the Empress M4's for a size comparison. Judging by THIS photo, the length seems fine, even if F2000S seems really tiny. It could use a liiiiittle more height, but certainly not over 0.25-0.5 mm, which is just too little to bother.
I am pretty sure I mentioned this before, but the difference between the standard FN F2000 (the one you see in computer games) and Slovene FN F2000S(lovenia) is in the rail for optics. Original gun has (when you take that oversized box off) a plastic rail that is fitted straight on the gun, while "our" version has a steel rail that is a bit rised, to allow space for a carrying handle. I have "intended" this handle on my sculpts, but it is so tiny it's barely noticeable. There are also some inside differences, but those don't really apply to our hobby.
![]() |
| F2000 "tactical" - the purely standard version has mechanical sights on top of the optics housing. |
![]() |
| F2000S with an aimpoint red dot - the one with UGL is the same. |
![]() |
| F2000S with trijicon "sharpshooter" optics - one per squad. |
I also filled and tried to thin the flash guard a bit...I can't really reproduce the shape of the original, but it doesn't have to that thick, either.
| You can see the tiny wire on the back of the optics in this photo. This was made to be cut away. |
I used the premade "optics buldge" and wrapped some GS around it. At one point I stuck a piece of wire half way in to get that tiny tube where batteries are stored. I also pushed some putty around to make sure the front half of the optics was a bit thicker than the rest. It didn't came out as nice as the Empress one, but I think it gives away the intention.
Trijicon was a bit more complex. The one you see below got scraped and I gave it another try.
Here you can see the second try. It's not the best representative, but the identifying feature of the optics is it's conical shape and not the adjustment buttons. It's hard to find the balance between the realistic details and an interesting model and it's something I'd need much more practice to find the balance at.
I made a Trijicon version and three red dot versions. One will be as it is, one will get a grenade launcher attached and the third is for my test miniature I am working on (more on that at a later date!). To avoid sculpting 20 optics, the bulk of my forces will be converted once I get those "updated" versions cast.
It has dawned to me I probably talked more than it was necessary in this post again, so I apologise for another lengthy post, but at least I have included lots of photos!
For a conclusion of today's post, I figured I would show you a size comparison photo. Below is an F2000S, British Sa80 (some 10 cm longer than F2000 IRL), M16 (around 30 cm longer IRL), Ultima ratio commando sniper rifle I am making (as usual, I hit a brick wall at the scope) and lastly a RGW90 disposable anti tank weapon. This one was finished before but I cut some of it off as it was too long. It should be as long as M16 IRL, so as you can see, I messed it up a bit.
And a shot of first try sniper rifle (lower one) and the new one. I am pretty certain starting over was a good idea as that rifle was just too tiny.
I also apologise for shameless advertisement, but I think this is the least I can do for the great guys of afore mentioned sculptors. This project would never come to a stage it is now if it weren't for their help.
Thanks for looking,
Mathyoo
Subscribe to:
Posts (Atom)