Hello guys,
I painted these three "civilians" a while ago. They are all made from Studio miniatures zombies, which I thought was as good source for civilians as it is for zombies. It isn't. No matter what you do, you can't get rid of the "shambling stance". I got a few more in the pipeline, but I will probably just use my zombies for larger rioting mob when needed.
The guy on the left could be either friendly or hostile, as he is waving around. The one in the middle is clearly ready to stir things up as he even invested in an overcool bandana to cover his face. And the old man appearance of the last guy shouldn't trick you - he carries a rock and is not afraid to use it!
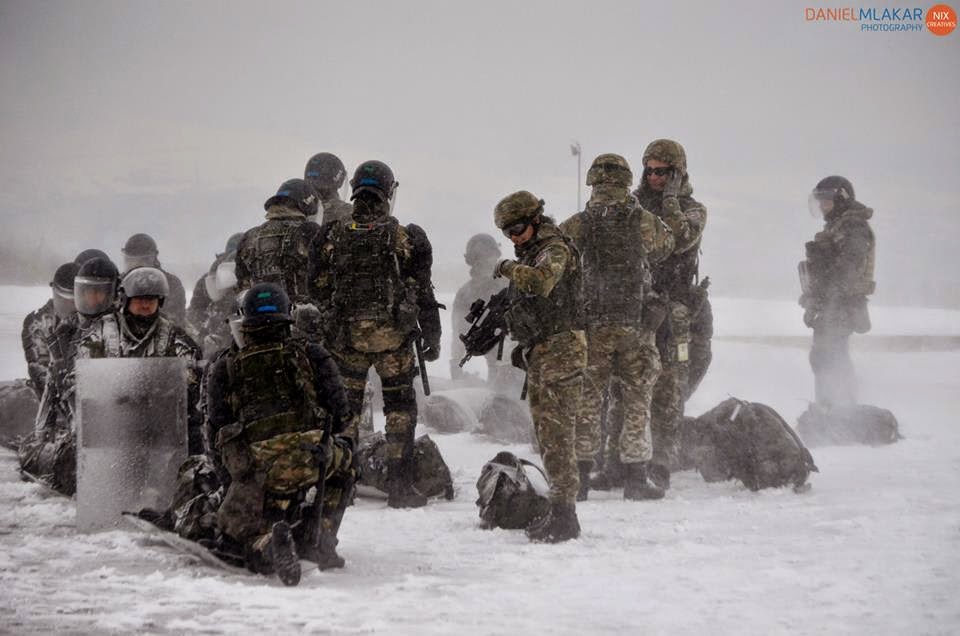
Evergreen soldier preparing a tear gas grenade behind cover.
I will be using them to litter the board, obviously, acting as a roadblock and another thing for both sides to worry about (you don't get people to support your insurgency by shooting at them!)
Perhaps it's time for some public ordering!
Photos are either from Germany in a preparation for Kosovo or the Kosovo itself (more likely as there are no role players around), I can't remember anymore.
Thanks for looking,
Mathyoo
Showing posts with label studio miniatures. Show all posts
18 Oct 2014
29 Jun 2014
More zombies!
Hello,
I got another four zombies to show today. The photos are a bit dark because the weather is bad, but I did made a step forward and used a white background this time!
There's 4 zombies, two from the Wargames factory female range and two from Studio miniatures plastic range.
Not much to say about them, really. I was mixing some paints to get the green blue colour and slapped it on. I went with "rotten flesh" look for their skin, which probably wasn't the best choice as they are not too decayed looking. I might mention the second female is heart breaking skinny, but I really like the broken ankle and the huge tight wound of the first one!
I only have 9 zombies to paint now, 3 of which are WW2 and 1 isn't really a zombie as it's a set of Mantic legs with a spine. Once I get those done, I believe a "horde" (group?) shot is in order.
Also, a quick shot of the special zombies with TCR. I know some times less is more, but when it comes to zombies more seems to be more and if it were for me, I would just slap TCR all over them!
That's it for today and I think I'll be back to modern gaming with my next post!
Thanks for looking,
Mathyoo
I got another four zombies to show today. The photos are a bit dark because the weather is bad, but I did made a step forward and used a white background this time!
There's 4 zombies, two from the Wargames factory female range and two from Studio miniatures plastic range.
Not much to say about them, really. I was mixing some paints to get the green blue colour and slapped it on. I went with "rotten flesh" look for their skin, which probably wasn't the best choice as they are not too decayed looking. I might mention the second female is heart breaking skinny, but I really like the broken ankle and the huge tight wound of the first one!
I only have 9 zombies to paint now, 3 of which are WW2 and 1 isn't really a zombie as it's a set of Mantic legs with a spine. Once I get those done, I believe a "horde" (group?) shot is in order.
Also, a quick shot of the special zombies with TCR. I know some times less is more, but when it comes to zombies more seems to be more and if it were for me, I would just slap TCR all over them!
That's it for today and I think I'll be back to modern gaming with my next post!
Thanks for looking,
Mathyoo
19 May 2014
More WIP - Modern and some others
Hello guys,
I got some more WIPs to share before I continue with the remaining of my insurgents. I'll start with the "others" category. My mojo is with the moderns these days, so those haven't been touched in either weeks or even months. Some have been waiting for some love for well over half a year already.
This is the case with Weird WW2 Uber soldaten / mutants. They were meant for my WWWII project that never really took off, but I have done bits and bobs in that direction. I got this great idea for a genetically enhanced soldier I had to build him right away (he is the one far right) and others were just something I made up as I went. I am not proud of whatever is that thing on the middle (it's worse in a back shot!) and well - the shark head wasn't one of the brightest ideas, either.
I think I could call the one on the right finished, but there is "something" missing. Something I can not put my finger to. The other two need some work on their heads and arms, which are two reasons why they never moved anywhere.
Next is a Kurent, a traditional carneval mask from eastern Slovenia (but some similar ones could be found elsewhere in Slavonic countries). I actually like him but work on him has stalled as he needs feathers added to his head and, again, his face and arm done. I will try to resume work on him as he's traditionally armed with a hedgehog stick and using some imagination, he could be used as a maniac in anything from 1930 until today.
On a photo below, he lies in a pile of weaponry, two of them being discarded F2000s and one is a disposable AT launcher. The "better" rifle and a minimi have been away for some time now, but I expect them back soonish (wink wink).
Talking of modern weapons, here are some modern "sub projects" I am working on.
First, the civilian horde. I am using Studio miniatures plastic zombies, if you were looking for a reason for their shambling. To put the credit where it is due this time, they were gifted by Vampifan of World of the undead fame! I have painted some others as zombies, but seeing I got a massive horde of around 50-60 zombies already (I know, I know...), I have decided to make some rioting civilians instead. The work is slow and the two without torsos (torsos were donated for humvee gunners) actually got beefed up a bit. I have concluded I still can't sculpt a human torso.
I plan on making around 12-16 civilians only and I will beef the mob with zombies if stars ever do get right and I will play a game.
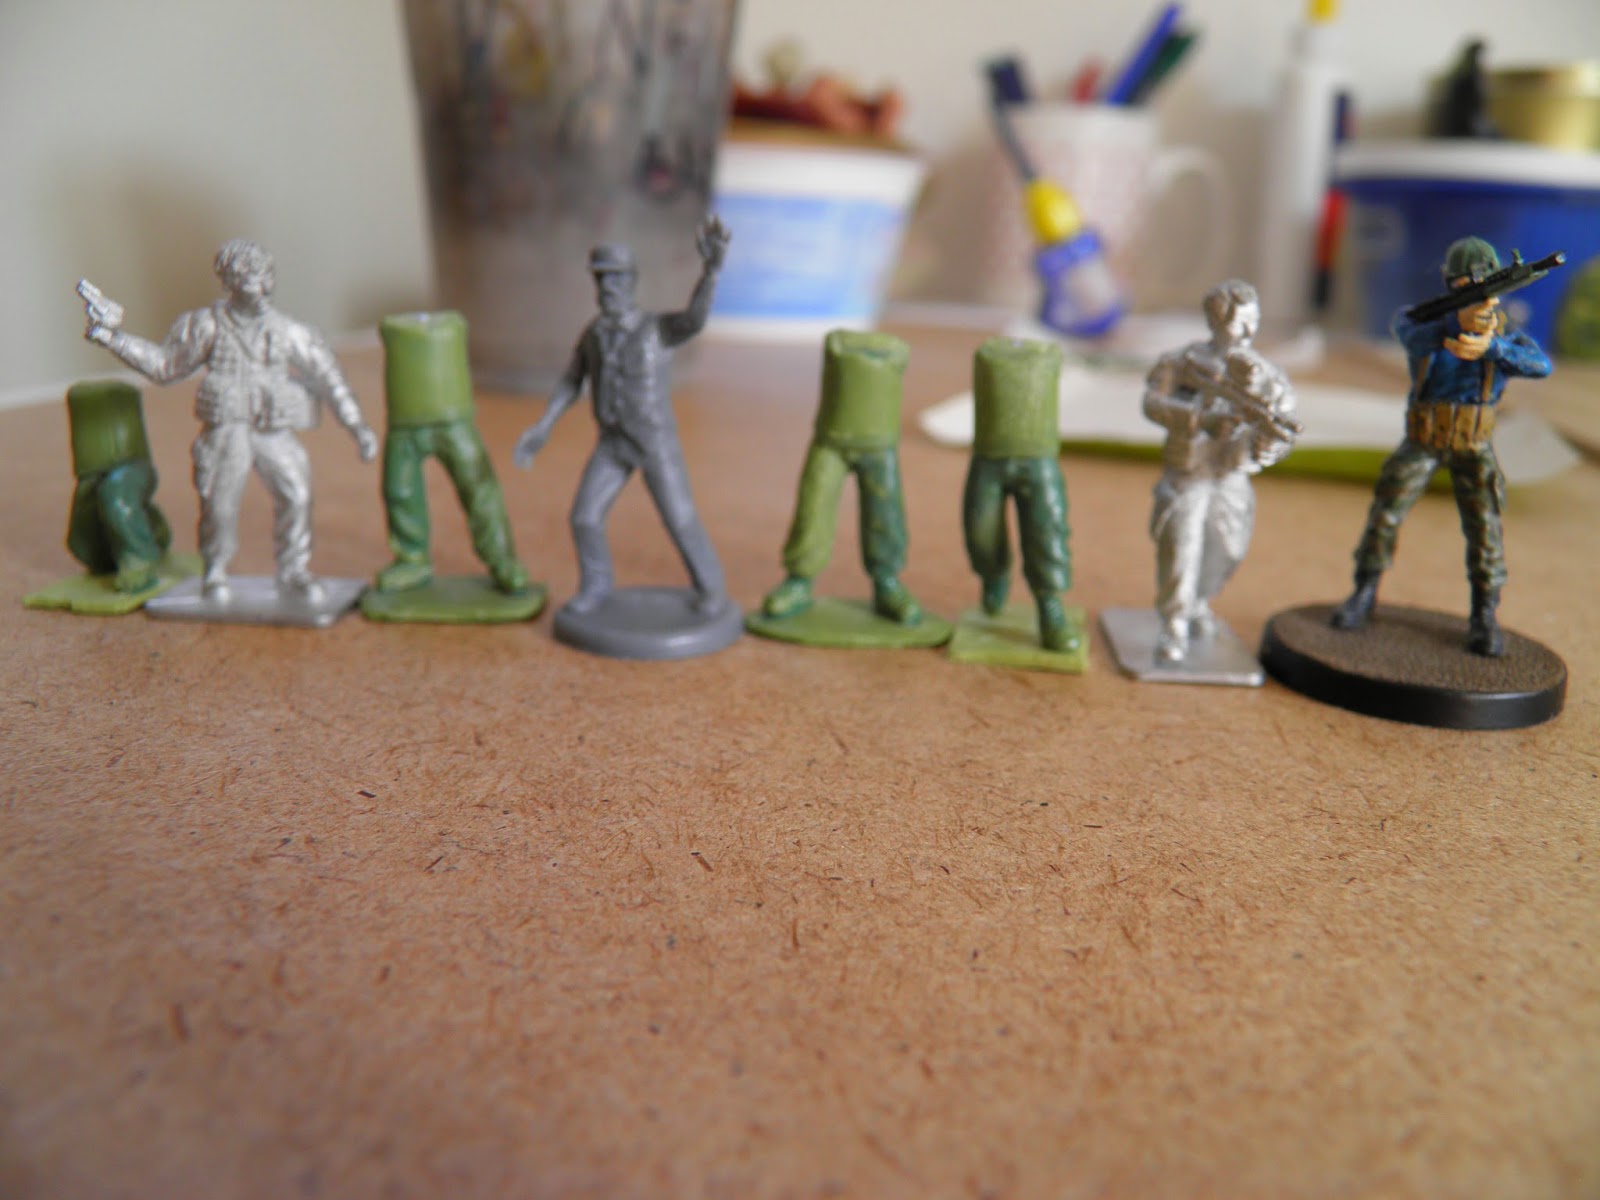
Down below are four soldiers I've been working on for a while now and have shown before. In the mean time, they didn't get much love as I am not all that satisfied with them. I think metal dollies (I was using eBob's armatures) don't help me all that much for some reason. I have stretched out their torsos at the stage below:
..then I got struck by a wish to have them completed and I have started working on them little by little every day in the last week. I don't have pictures but I have sculpted lower brims of their shirts and then started working on a flak vest over it...until yesterday, that is. I have compared them to the two Empress miniatures I have and found out that if they have been too small at the beginning, they were too large now. Without a thought, I cut their shoulders right of. This made their vests too small, so I had to cut off the shirt and make them longer. Adding some putty to the vest was actually a harder operation than expected and it made me regret my choice.
You can see the little extra work I've done below. I think I will just forget about it and about those horrible feet and just finish them. I had some ideas of trying to get them cast and just add heads and sculpt new pair of arms on everyone (while keeping the same torso and legs), but I don't think I will do that. Instead, I will give another 4 a shot eventually, perhaps trying to make my own wire armatures again. I must also be doing something wrong with my pants as it took me way too long to get them to a stage they are in now. I dread the thought to sculpt so many different vests and pouches, so I think it would be a great idea to invest in some instamould very soon, too :D.
Lastly, here is a comparison photo. Green are mine, metal are by Empress, plastic by SM, painted by WGF. Mine will somehow end up much bulkier than I expected (I was worried they would be very thin), especially when I will add countless pouches to them. I actually prefer it that way - the flow of tiny eye candy doesn't suit me.
Ah, I forgot. Here is also a quick photo of a sniper I am working on. Between the constant dilemma of too big - too small, this one came out too small and will be scraped. On the other hand, it was made from scratch and looks like a rifle so I have concluded the idea was all right. I will start over and keep you posted!
Thanks for looking,
Mathyoo
I got some more WIPs to share before I continue with the remaining of my insurgents. I'll start with the "others" category. My mojo is with the moderns these days, so those haven't been touched in either weeks or even months. Some have been waiting for some love for well over half a year already.
This is the case with Weird WW2 Uber soldaten / mutants. They were meant for my WWWII project that never really took off, but I have done bits and bobs in that direction. I got this great idea for a genetically enhanced soldier I had to build him right away (he is the one far right) and others were just something I made up as I went. I am not proud of whatever is that thing on the middle (it's worse in a back shot!) and well - the shark head wasn't one of the brightest ideas, either.
I think I could call the one on the right finished, but there is "something" missing. Something I can not put my finger to. The other two need some work on their heads and arms, which are two reasons why they never moved anywhere.
Next is a Kurent, a traditional carneval mask from eastern Slovenia (but some similar ones could be found elsewhere in Slavonic countries). I actually like him but work on him has stalled as he needs feathers added to his head and, again, his face and arm done. I will try to resume work on him as he's traditionally armed with a hedgehog stick and using some imagination, he could be used as a maniac in anything from 1930 until today.
On a photo below, he lies in a pile of weaponry, two of them being discarded F2000s and one is a disposable AT launcher. The "better" rifle and a minimi have been away for some time now, but I expect them back soonish (wink wink).
Talking of modern weapons, here are some modern "sub projects" I am working on.
First, the civilian horde. I am using Studio miniatures plastic zombies, if you were looking for a reason for their shambling. To put the credit where it is due this time, they were gifted by Vampifan of World of the undead fame! I have painted some others as zombies, but seeing I got a massive horde of around 50-60 zombies already (I know, I know...), I have decided to make some rioting civilians instead. The work is slow and the two without torsos (torsos were donated for humvee gunners) actually got beefed up a bit. I have concluded I still can't sculpt a human torso.
I plan on making around 12-16 civilians only and I will beef the mob with zombies if stars ever do get right and I will play a game.
Down below are four soldiers I've been working on for a while now and have shown before. In the mean time, they didn't get much love as I am not all that satisfied with them. I think metal dollies (I was using eBob's armatures) don't help me all that much for some reason. I have stretched out their torsos at the stage below:
..then I got struck by a wish to have them completed and I have started working on them little by little every day in the last week. I don't have pictures but I have sculpted lower brims of their shirts and then started working on a flak vest over it...until yesterday, that is. I have compared them to the two Empress miniatures I have and found out that if they have been too small at the beginning, they were too large now. Without a thought, I cut their shoulders right of. This made their vests too small, so I had to cut off the shirt and make them longer. Adding some putty to the vest was actually a harder operation than expected and it made me regret my choice.
You can see the little extra work I've done below. I think I will just forget about it and about those horrible feet and just finish them. I had some ideas of trying to get them cast and just add heads and sculpt new pair of arms on everyone (while keeping the same torso and legs), but I don't think I will do that. Instead, I will give another 4 a shot eventually, perhaps trying to make my own wire armatures again. I must also be doing something wrong with my pants as it took me way too long to get them to a stage they are in now. I dread the thought to sculpt so many different vests and pouches, so I think it would be a great idea to invest in some instamould very soon, too :D.
Lastly, here is a comparison photo. Green are mine, metal are by Empress, plastic by SM, painted by WGF. Mine will somehow end up much bulkier than I expected (I was worried they would be very thin), especially when I will add countless pouches to them. I actually prefer it that way - the flow of tiny eye candy doesn't suit me.
Ah, I forgot. Here is also a quick photo of a sniper I am working on. Between the constant dilemma of too big - too small, this one came out too small and will be scraped. On the other hand, it was made from scratch and looks like a rifle so I have concluded the idea was all right. I will start over and keep you posted!
Thanks for looking,
Mathyoo
23 Mar 2014
Zombies again
Hello guys,
I've been working on hobby related stuff quite a lot lately, yet I kinda feel I have nothing to show you. Following great weather, there is a downpour today, so I didn't want to take photos of the insurgents conversions I was posting lately. I have mostly all done by now, and of those some are more or less successful :P.
Luckily, this means I finally got an opening to show you zombies I've painted a while ago. They are not my best paint jobs, somehow I find zombies boring to paint lately.
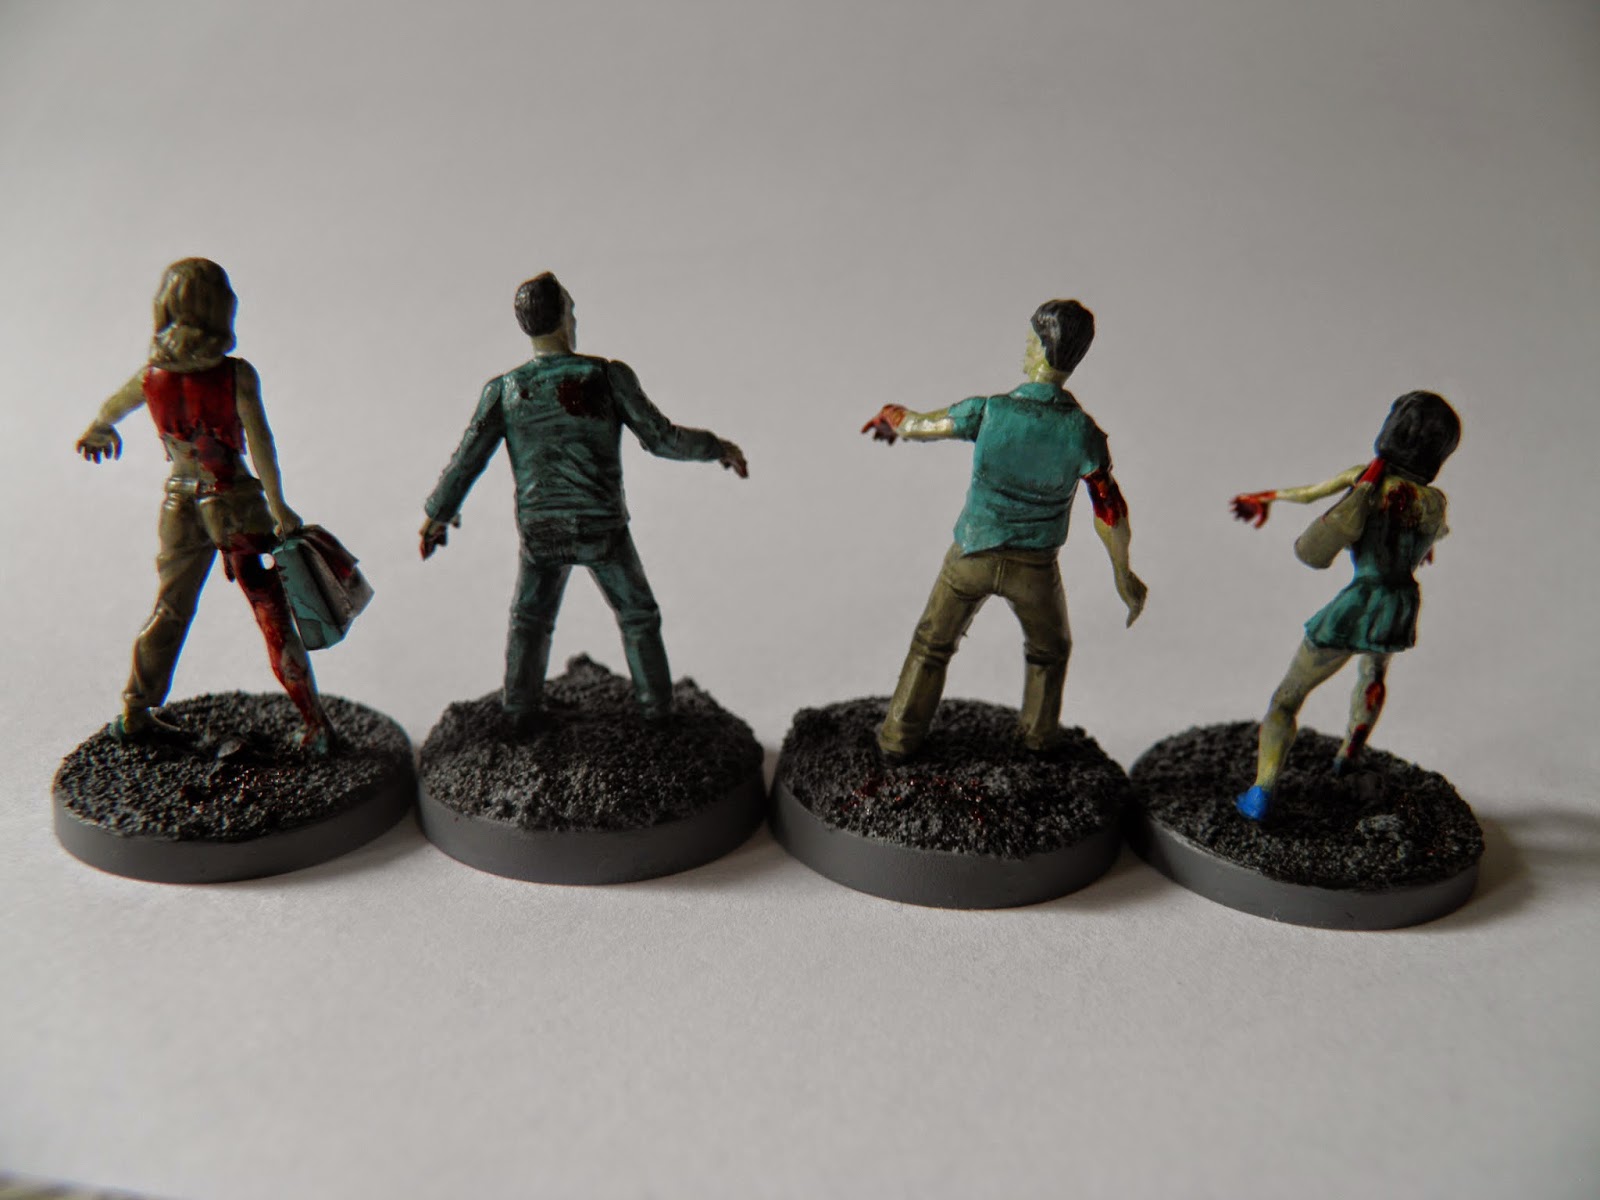
They are the "usual" group of 4, with 2 vixens and two studio miniatures male zombies. Again, they all have mostly similar colour palette, which I figured should speed up the painting. While they may look too unified when put together, colours blend in with the rest of the "horde" (that's now betwen 50-60 zombies strong, if you were wondering).
I only got two photos to show you the front and back of the figures. Except for the news guy, they are all striaght out of the box, painted and with some blood splashed. There really isn't much to say about them.
Journalist is a ripped half naked zombie guy that got converted. I don't like my zombies looking all alike and if there's anything I dislike even more, it's overmuscular body showing from under a thorn shirt. Booooring. So, at first, I started sculpting helmet and body armour on him to make him a police man or a soldier...but that's quite boring as well. I was highly influenced by modern combat at the time I was painting those, so I remembered I could always do with a dead reporter. Someone has to risk his life to let the people know what is going on! So...that's it. Eagle eyed readers might notice he has his camera entangled around his feet.
Thanks for looking,
Mathyoo
I've been working on hobby related stuff quite a lot lately, yet I kinda feel I have nothing to show you. Following great weather, there is a downpour today, so I didn't want to take photos of the insurgents conversions I was posting lately. I have mostly all done by now, and of those some are more or less successful :P.
Luckily, this means I finally got an opening to show you zombies I've painted a while ago. They are not my best paint jobs, somehow I find zombies boring to paint lately.
They are the "usual" group of 4, with 2 vixens and two studio miniatures male zombies. Again, they all have mostly similar colour palette, which I figured should speed up the painting. While they may look too unified when put together, colours blend in with the rest of the "horde" (that's now betwen 50-60 zombies strong, if you were wondering).
I only got two photos to show you the front and back of the figures. Except for the news guy, they are all striaght out of the box, painted and with some blood splashed. There really isn't much to say about them.
Journalist is a ripped half naked zombie guy that got converted. I don't like my zombies looking all alike and if there's anything I dislike even more, it's overmuscular body showing from under a thorn shirt. Booooring. So, at first, I started sculpting helmet and body armour on him to make him a police man or a soldier...but that's quite boring as well. I was highly influenced by modern combat at the time I was painting those, so I remembered I could always do with a dead reporter. Someone has to risk his life to let the people know what is going on! So...that's it. Eagle eyed readers might notice he has his camera entangled around his feet.
Thanks for looking,
Mathyoo
25 Jan 2014
More zombies! Aaargh!
Hey guys,
even more zombies to show today. Same again, 2 male zombies from Studio Miniatures plastics and two female zombies from Wargames factory (okay, it's one and a half).
Not much to say, they are all straight from the box (and probably last one like that, as I'm already converting some, more on that in one of the next posts!). I went for "formal" black and white colours. I've also put in another jeans as all I do is blue wash over white. I think lots of zombies will have jeans, which is odd as I don't own a single pair of those myself.
So, there is my least favorite sculpt there, the fit half naked male zombie and your ordinary office Joe. That has red on him and looks like someone everyone should know. There is simply no other way to paint a guy in a shirt and a tie.
Female zombies are a bit more interesting, one is a crawler and the other one is an office lady. Her right sleeve was actually painted on, as I've somehow glued a bare arm there. I got no idea, how I didn't notice that. It looks fine, however.
I've decided to put some extra blood on her for two reasons. First, Tamiya Clear Red is probably the single reason I enjoy painting zombies over painting anything else. And second, I figured it would look cool - is that a "smart" zombie, using an improvised weapon or the blood is old this woman was bashing skulls with her yesterday-so-important paperwork? Who'd knew!
In the background you can see some dollies as my moderns project is slowly gaining steam again.
Really nothing else I could say. I got a FOW tournament tomorrow. It should be a blast as I got my favorite army ready. It's not competitive and I haven't played in months but it has pionieres and Stugs, so I got that going for me! Can't promise any photos, but I just might take the camera with me for a change.
Thanks for looking,
Mathyoo
even more zombies to show today. Same again, 2 male zombies from Studio Miniatures plastics and two female zombies from Wargames factory (okay, it's one and a half).
Not much to say, they are all straight from the box (and probably last one like that, as I'm already converting some, more on that in one of the next posts!). I went for "formal" black and white colours. I've also put in another jeans as all I do is blue wash over white. I think lots of zombies will have jeans, which is odd as I don't own a single pair of those myself.
So, there is my least favorite sculpt there, the fit half naked male zombie and your ordinary office Joe. That has red on him and looks like someone everyone should know. There is simply no other way to paint a guy in a shirt and a tie.
Female zombies are a bit more interesting, one is a crawler and the other one is an office lady. Her right sleeve was actually painted on, as I've somehow glued a bare arm there. I got no idea, how I didn't notice that. It looks fine, however.
I've decided to put some extra blood on her for two reasons. First, Tamiya Clear Red is probably the single reason I enjoy painting zombies over painting anything else. And second, I figured it would look cool - is that a "smart" zombie, using an improvised weapon or the blood is old this woman was bashing skulls with her yesterday-so-important paperwork? Who'd knew!
In the background you can see some dollies as my moderns project is slowly gaining steam again.
Really nothing else I could say. I got a FOW tournament tomorrow. It should be a blast as I got my favorite army ready. It's not competitive and I haven't played in months but it has pionieres and Stugs, so I got that going for me! Can't promise any photos, but I just might take the camera with me for a change.
Thanks for looking,
Mathyoo
15 Jan 2014
Zombies...gaah...
Hello guys,
I was hoping I would post earlier, but I really didn't want to put in another filler post, so I have decided I would rather wait until I finish painting the four zombies (that took me way too long to paint).
What I am doing now is painting a couple of WGF Vixens and a couple of SM male zombies (thanks again Bryan :P) - so 4 zombies at a time. This will give me nice variety of male and female zombies and I will actually have something painted. Or at least that is the plan.
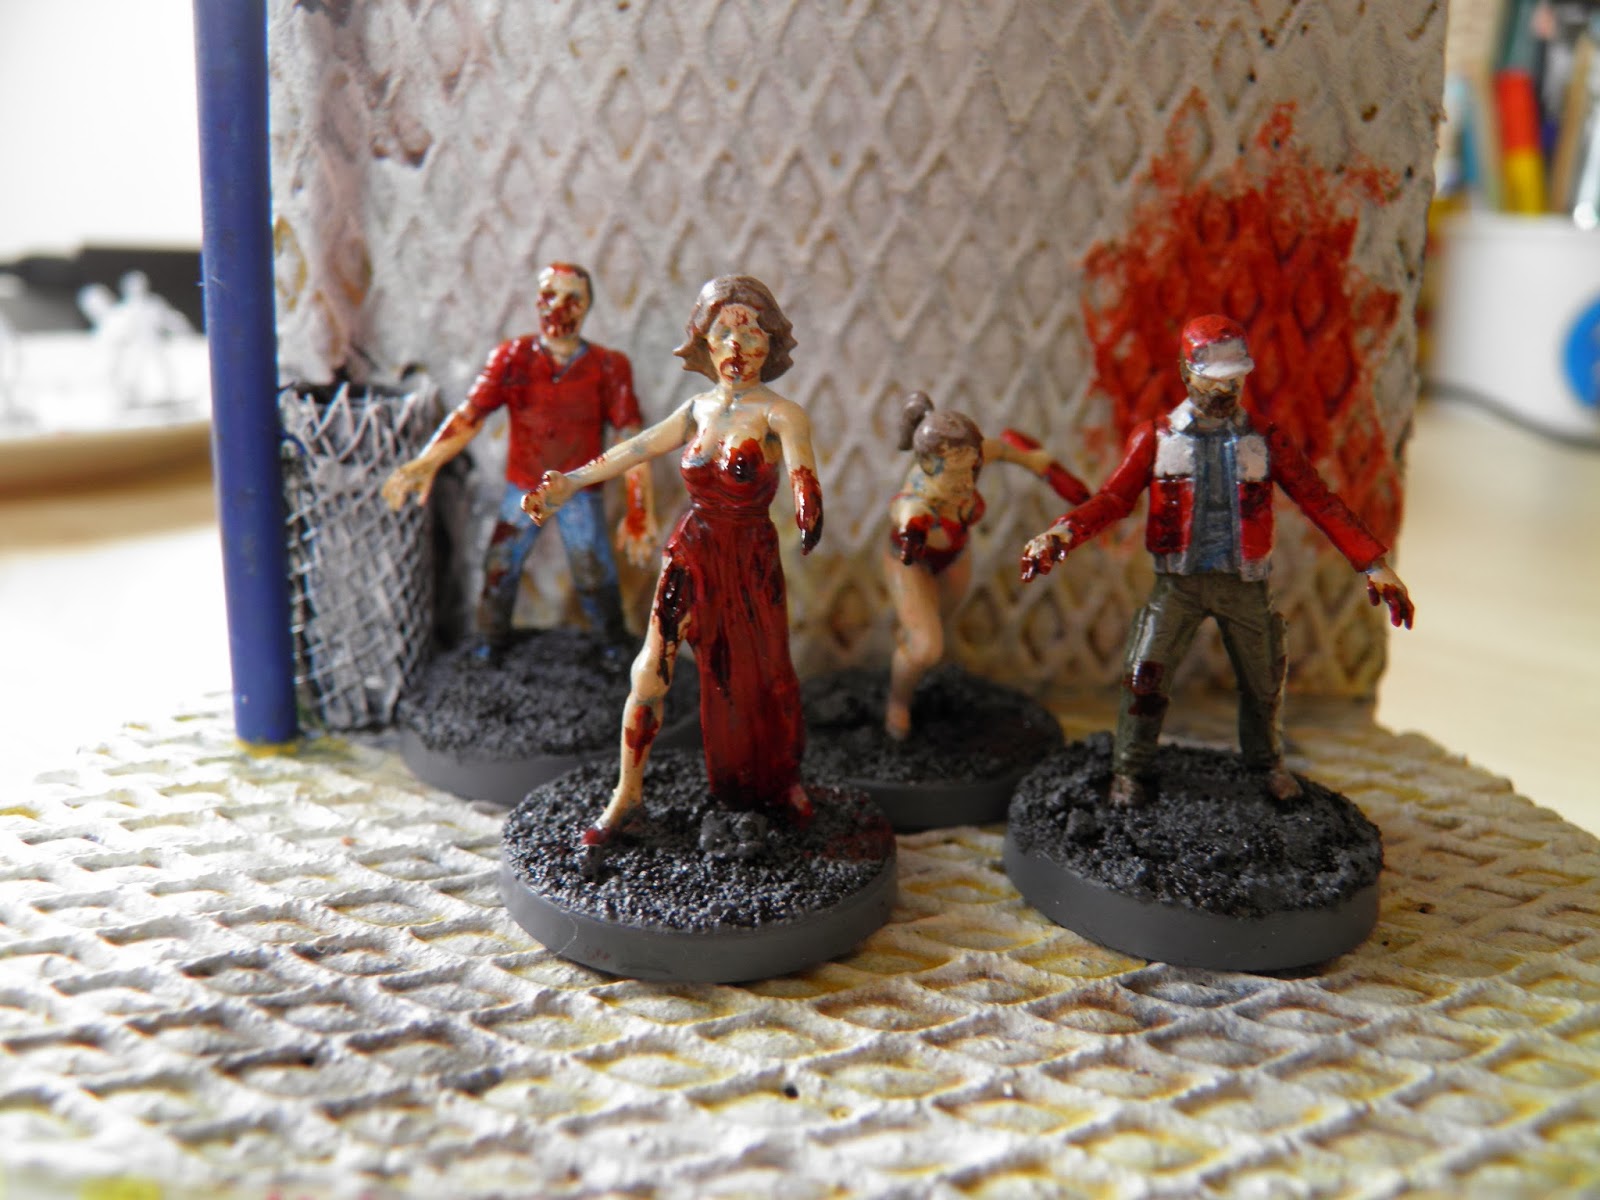
I went for red here, which is the worst colour you can paint your zombies in. No blood is visible! Then again, I picked red because of the bay watch zombie (that sucks).
Not much to say, they are painted horribly, but I am happy I managed to finish them at least. They seem too red when they are together, but once they will be mixed with the rest of the "horde", that shouldn't be as visible. I went for missing arm on the Pamela there, as I would hate it even more if she'd be in a super man pose. The miniatures aren't too bad, honestly, very nicely sculpted. What I don't like is the shallow detail and limited options, so I have to admit the old WGF set is still my favorite. The sculpts are way worse there, but I somehow prefer them to any other plastic zombies I've seen so far. I might want to mention I like how WGF is listening to the comments, first they made females everyone wanted and when doing survivors, they've put a fat one in (is that offensive?). I don't like to have all models in my zombie horde.
One thing I didn't do was convert any, I'm pretty sure I've hit rock bottom on my hobby enthusiasm and I am pretty sure I will buy some cheap 6-10mm miniatures to get me back in, give me sometihng I haven't yet tried to try. I really can't decide on the period, so please do suggest some. I am currently inter debating between late romans (remember roman wall and that battle I was talking about?), WW1 (always wanted to do something about WW1 :D), cold war gone hot (pre-abrams, way more interesting. T-72 was a great tank once in the past!), sci-fi. I don't really expect to game with it, but I would like to do something. Something is fun :D. Now I just can't decide if massive red tide would look better than ranks of sword swinging hordes. I can't even decide between 6 and 10, tbh. But I would like to have a huge miniature town one day. For some reason.
Well, thanks for looking,
Mathyoo
I was hoping I would post earlier, but I really didn't want to put in another filler post, so I have decided I would rather wait until I finish painting the four zombies (that took me way too long to paint).
What I am doing now is painting a couple of WGF Vixens and a couple of SM male zombies (thanks again Bryan :P) - so 4 zombies at a time. This will give me nice variety of male and female zombies and I will actually have something painted. Or at least that is the plan.
I went for red here, which is the worst colour you can paint your zombies in. No blood is visible! Then again, I picked red because of the bay watch zombie (that sucks).
Not much to say, they are painted horribly, but I am happy I managed to finish them at least. They seem too red when they are together, but once they will be mixed with the rest of the "horde", that shouldn't be as visible. I went for missing arm on the Pamela there, as I would hate it even more if she'd be in a super man pose. The miniatures aren't too bad, honestly, very nicely sculpted. What I don't like is the shallow detail and limited options, so I have to admit the old WGF set is still my favorite. The sculpts are way worse there, but I somehow prefer them to any other plastic zombies I've seen so far. I might want to mention I like how WGF is listening to the comments, first they made females everyone wanted and when doing survivors, they've put a fat one in (is that offensive?). I don't like to have all models in my zombie horde.
One thing I didn't do was convert any, I'm pretty sure I've hit rock bottom on my hobby enthusiasm and I am pretty sure I will buy some cheap 6-10mm miniatures to get me back in, give me sometihng I haven't yet tried to try. I really can't decide on the period, so please do suggest some. I am currently inter debating between late romans (remember roman wall and that battle I was talking about?), WW1 (always wanted to do something about WW1 :D), cold war gone hot (pre-abrams, way more interesting. T-72 was a great tank once in the past!), sci-fi. I don't really expect to game with it, but I would like to do something. Something is fun :D. Now I just can't decide if massive red tide would look better than ranks of sword swinging hordes. I can't even decide between 6 and 10, tbh. But I would like to have a huge miniature town one day. For some reason.
Well, thanks for looking,
Mathyoo
19 Aug 2013
Hummers to Humvees - part 6
Hello guys,
I've been painting the humvees for past few days on and off (had to repaint the vehicles themselves a lot, which has pretty much killed my enthusiasm for a while). I've decided to break vehicles and gunners into two separate posts to keep my thoughts and colour choices regarding the uniform separate.
Before I could completely put gunners together, I had to pain the men themselves, so they wouldn't be obstructed by guns.
While uniforms could be quite straightforward project, there is a problem. We're just getting new uniforms and I got no idea how the helmet covers and vests will look like. I've decided to just go with what is happening now and paint slocam (yes, that's the name of the new camo :P) for uniform and use old amoeba pattern for helmet cover and vest. Plus, models in one color (or one color scheme) are really boring...painting one camo is just like painting black, cool at first but boring eventually. I know there's much desert fighting going on, but I am really tired of desert from my FOW projects. Plus, I'm anxios to paint some face paints on my troops, so they will fight in woodland areas - from Evergreen Fields to perhaps a neo-soviet armored spearhead through Slovenia to Italian northern plains?
Here is a comparative photos of old and new uniforms. Old desert pattern was essentially same as the woodland one, but with sandy colours.
This is a photo from early testing, so the cut of the uniform itslef is the same. New cut includes angled pockets, big velctro "panels" on sleeves for insignia etc. But this isn't really important in 28mm, so what we care about is the new pattern and colours.
As slocam is very simmilar to multicam (but not the same, mind you!), and by that, to new british pattern, I was looking for articles for those two uniforms. I don't have too many paints available, so I've figured I'd experiment on the gunners a bit.
I've used Vallejo colors and what I've found out...it would be perhaps better to stipple than actually paint patterns, as even most dominant colors are split in small dots here and there:
Uniform was based on mix of german fieldgrey and dead flesh to get this lightly green color. Mine is a tad to grey, I suppose.
I then made number of bigger patches in green ochre. Qute random, and not too big and not too many (that's the idea, not what I did :P)
Next was luftwaffe camo green.
After it I've done some smaller strokes of german camo medium brown. At this point I've figured they're really all too round, so its probably really best to take your time and use small brush...or stipple for fast work I suppose.
Last was elfic flesh, but I think any bone colour wold work.
Here are the colors for our old "amoeba" pattern I've used. I don't claim their right, its just my choice atm, based on available colors.
Base was done in german fieldgray, mixed with some elfic flesh to make it a bit brighter.
Patches were simply german grey (instead of black), german camo medium brown and luftwaffe camo green.
I've washed it all with a bit of green grey, but I think it as too thick. I've tried "gloss+black" paint again, but it didn't really work. As my camo blotches are all too big, it all came out a bit under my expectations, but on the other hand it made me think I should add an all round armored cupolas to gun mounts. This way I'd hide the horrible paintjob and it would look more realistic, I don't think any humvees are without one by now :D.
Below is the rough result. It looks fine from far but not as nice if you look from closer distance. I really think I shouldn't rush it and should just use a smaller brush. The wash was really useful to tie it all together a bit more, but it was too thick in the end.
You can see I've sculpted some fingers on the left gunner and started detailing straps on his helmet some more. It needs one more perpendicular stripe. You probably can't see it on this photo, but the vest looks much like the jacket, so I think I totally blew it. I think I'll keep it that way and won't be repainting anything. If it will bother me too much, I can always come back and redo the sleeves - it is the only visible part, after all.
Well, sorry to keep it so "photo light", but I'll have more when I'll show you the current WIP of the Humvees themselves - which I think look quite decent at this point :P.
Thanks for looking,
Mathyoo
I've been painting the humvees for past few days on and off (had to repaint the vehicles themselves a lot, which has pretty much killed my enthusiasm for a while). I've decided to break vehicles and gunners into two separate posts to keep my thoughts and colour choices regarding the uniform separate.
Before I could completely put gunners together, I had to pain the men themselves, so they wouldn't be obstructed by guns.
While uniforms could be quite straightforward project, there is a problem. We're just getting new uniforms and I got no idea how the helmet covers and vests will look like. I've decided to just go with what is happening now and paint slocam (yes, that's the name of the new camo :P) for uniform and use old amoeba pattern for helmet cover and vest. Plus, models in one color (or one color scheme) are really boring...painting one camo is just like painting black, cool at first but boring eventually. I know there's much desert fighting going on, but I am really tired of desert from my FOW projects. Plus, I'm anxios to paint some face paints on my troops, so they will fight in woodland areas - from Evergreen Fields to perhaps a neo-soviet armored spearhead through Slovenia to Italian northern plains?
Here is a comparative photos of old and new uniforms. Old desert pattern was essentially same as the woodland one, but with sandy colours.
This is a photo from early testing, so the cut of the uniform itslef is the same. New cut includes angled pockets, big velctro "panels" on sleeves for insignia etc. But this isn't really important in 28mm, so what we care about is the new pattern and colours.
As slocam is very simmilar to multicam (but not the same, mind you!), and by that, to new british pattern, I was looking for articles for those two uniforms. I don't have too many paints available, so I've figured I'd experiment on the gunners a bit.
I've used Vallejo colors and what I've found out...it would be perhaps better to stipple than actually paint patterns, as even most dominant colors are split in small dots here and there:
Uniform was based on mix of german fieldgrey and dead flesh to get this lightly green color. Mine is a tad to grey, I suppose.
I then made number of bigger patches in green ochre. Qute random, and not too big and not too many (that's the idea, not what I did :P)
Next was luftwaffe camo green.
After it I've done some smaller strokes of german camo medium brown. At this point I've figured they're really all too round, so its probably really best to take your time and use small brush...or stipple for fast work I suppose.
Last was elfic flesh, but I think any bone colour wold work.
Here are the colors for our old "amoeba" pattern I've used. I don't claim their right, its just my choice atm, based on available colors.
Base was done in german fieldgray, mixed with some elfic flesh to make it a bit brighter.
Patches were simply german grey (instead of black), german camo medium brown and luftwaffe camo green.
I've washed it all with a bit of green grey, but I think it as too thick. I've tried "gloss+black" paint again, but it didn't really work. As my camo blotches are all too big, it all came out a bit under my expectations, but on the other hand it made me think I should add an all round armored cupolas to gun mounts. This way I'd hide the horrible paintjob and it would look more realistic, I don't think any humvees are without one by now :D.
Below is the rough result. It looks fine from far but not as nice if you look from closer distance. I really think I shouldn't rush it and should just use a smaller brush. The wash was really useful to tie it all together a bit more, but it was too thick in the end.
You can see I've sculpted some fingers on the left gunner and started detailing straps on his helmet some more. It needs one more perpendicular stripe. You probably can't see it on this photo, but the vest looks much like the jacket, so I think I totally blew it. I think I'll keep it that way and won't be repainting anything. If it will bother me too much, I can always come back and redo the sleeves - it is the only visible part, after all.
Well, sorry to keep it so "photo light", but I'll have more when I'll show you the current WIP of the Humvees themselves - which I think look quite decent at this point :P.
Thanks for looking,
Mathyoo
11 Aug 2013
Hummers to Humvees - part 5
Hello,
this is probably going to be the most interesting post of the project, except for finished models. I've been working on the gunners!
I've used studio miniatures zeds as a basis, as I've figured they're of the right size, plus very nicely proportioned. I've sculpted rough vests on them. I'm not exactly happy with the size, but they're good for what they're mean for.
Below you can see which torsos I've used. One is the bare chested one and the other one was some kind of t-shirt or something. I've used arms under each of them (on the photo, only one pair of arms is off the sprue).
Here are the gun mounts. So, what we got is hatches glued on and mounts damaged as I've glued and then un-glued (and later glued again) the gunners on and off for some reason. The short Z wire bits are meant for mounting the guns. As they're oversized, they had to be placed further out a bit to make them work.
Gunners in position below, one has his arms glued in place (without hands, I've added those later). You can see I've sculpted helmets, too. This was supposed to be a base for better helmets, but I think I'll just add the camo straps and that'll be it. Our new helmets make you look like a penny bun (which we call "Geordie", btw :D), so you can see I didn't really hit the correct shape. But I think the general shape is fine and it isn't worth potentially ruining the gunners just because of the helmets.
Here is another shot. Left gunner is in a firing position and because I didn't do any dry fitting, right gunner appears to be talking to someone inside the humvee. I'm quite happy with that, so they're not both the same.
Here they are with guns dry fitted. I will only glue guns after gunners are painted. The problem is, I can't finish hands of the firing gunner (he is missing fingers) until I glue the gun on. They are very front heavy and "chatting" gunner can't stand without support yet. As you can see, he is holding the gun by cocking lever. This is probably not done IRL, but I couldn't make him hold the firing grips without too much work, so I've decided thats fine. I've also tried positioning gun in a way that he'd be holding the body of the gun itself, but this would point gun too high. That would look kinda realistic, as he would be pointing the gun in the sky - to avoid any accidents. But, as this is a gaming model, anything pointing too high is probably not the best idea.
Two very bad close ups on the gunners. I had more, but every other photo was worse than those.
And last one on the humvee, to see how it will look like when its done. I'm really happy with it. Humvee was sprayed few days back, but it still tacky on the door area (you can see it attracted dust somehow :/ ). I am not sure if it is tacky because of the paint, but given only miliputted area is tacky now, I think the problem is that miliput hasn't dried enough and I had done 3 layers of it. I will give it another 24 hours and I hope I can put it back together and start painting them by then.
Well, that's it for now,
thanks for looking!
Mathyoo
this is probably going to be the most interesting post of the project, except for finished models. I've been working on the gunners!
I've used studio miniatures zeds as a basis, as I've figured they're of the right size, plus very nicely proportioned. I've sculpted rough vests on them. I'm not exactly happy with the size, but they're good for what they're mean for.
Below you can see which torsos I've used. One is the bare chested one and the other one was some kind of t-shirt or something. I've used arms under each of them (on the photo, only one pair of arms is off the sprue).
Here are the gun mounts. So, what we got is hatches glued on and mounts damaged as I've glued and then un-glued (and later glued again) the gunners on and off for some reason. The short Z wire bits are meant for mounting the guns. As they're oversized, they had to be placed further out a bit to make them work.
Gunners in position below, one has his arms glued in place (without hands, I've added those later). You can see I've sculpted helmets, too. This was supposed to be a base for better helmets, but I think I'll just add the camo straps and that'll be it. Our new helmets make you look like a penny bun (which we call "Geordie", btw :D), so you can see I didn't really hit the correct shape. But I think the general shape is fine and it isn't worth potentially ruining the gunners just because of the helmets.
Here is another shot. Left gunner is in a firing position and because I didn't do any dry fitting, right gunner appears to be talking to someone inside the humvee. I'm quite happy with that, so they're not both the same.
Here they are with guns dry fitted. I will only glue guns after gunners are painted. The problem is, I can't finish hands of the firing gunner (he is missing fingers) until I glue the gun on. They are very front heavy and "chatting" gunner can't stand without support yet. As you can see, he is holding the gun by cocking lever. This is probably not done IRL, but I couldn't make him hold the firing grips without too much work, so I've decided thats fine. I've also tried positioning gun in a way that he'd be holding the body of the gun itself, but this would point gun too high. That would look kinda realistic, as he would be pointing the gun in the sky - to avoid any accidents. But, as this is a gaming model, anything pointing too high is probably not the best idea.
Two very bad close ups on the gunners. I had more, but every other photo was worse than those.
And last one on the humvee, to see how it will look like when its done. I'm really happy with it. Humvee was sprayed few days back, but it still tacky on the door area (you can see it attracted dust somehow :/ ). I am not sure if it is tacky because of the paint, but given only miliputted area is tacky now, I think the problem is that miliput hasn't dried enough and I had done 3 layers of it. I will give it another 24 hours and I hope I can put it back together and start painting them by then.
Well, that's it for now,
thanks for looking!
Mathyoo
Subscribe to:
Posts (Atom)