Hi guys,
I played another game earlier this week. It was rather large and to keep it interesting, involved the introduction of elite foreign fighters on the rebel's side and a tank (yes, a tank) in the arsenal of Slovenes.
Following the ambush of Slovenes [look at the last post], more similar attacks on the international and government forces were carried out in the capital. The attacks in the North of the city were so fierce and numerous, that the rebels were able to fortify themselves in the area and do not plan to be moved from there.
As a result, Operation Angelica was devised with hopes of clearing this large pocket of resistance and to establish a firm governmental control of the capital again. Once the capital will be secured, recapturing of the inland will be made possible. Attacking from several lanes of approach, the IIF (International Intervention Force) will push into the territory and clear it. It is hoped that sheer strength and determination of the attack will break the rebellion, but the fighting could just as well bog down to a costly street fighting.
Assault at the Cedar lane will be spearheaded by the Slovenes. The road is blocked and covered by fire from the near-by houses turned strongpoints, overlooking the position. Slovenes have to make their way to the barricade and check it for any signs of explosives [a fair roll of 4+ on D6]. If the barricade is mined, EOD team has to be called in [arrives next turn on the roll of 6, then 5+, 4+ on any other turn] and cleared by the EOD technician [roll of 4+].
Once the barricade is safe to be removed, an M-84 tank will assist in pushing open the road for the reinforcements to advance.
Beware: Damage to property must be minimal, so tank's main gun is not to be used, unless against enemy armour - if it appears.
For the same reason, artillery or air support will not be available for the attacking troops.
SAF Force: Three fire teams (Ankaran, Bled, Celje), supported by a MMG team for the initial assault.
An M84 tank is to join the attack for the push past the barricade. It is vital that the tank is not exposed to unnecessary fire and - when engaged - that it is fully supported by the infantry.
If the attack bogs down, SAF troops on the flanks might send additional men to make sure the attack goes well.
Rebel force:
One group of foreign fighters, well equipped with an RPG (Group Arnold).
Three groups of local fighters, armed with automatic weapons (Groups Brad, Charles, Duncan) [low rolls so no RPGs here]
Sniper.
MMG team.
Starting set up:
SAF in left side, bottom up: Team Ankaran behind a grey house, MMG team at the concrete wall, Team Bled behind the trees, Team Celje behind the terracotta house.
Rebels from right to left, bottom up: MMG team on top of the super market, Foreign fighters Group Arnold behind the sand bags, Sniper on top of the motel, Group Brad in blue semi-detached house, Charles in light blue house, Duncan behind white house on top.
Opening Operation Angelica, Slovenes pushed rather reluctantly.
Team Ankaran ran to the green house in an attempt to secure barricade's right flank.
Team Celje pushed in the larger house in the orchard and opened fire at rebel Group Charles, scoring one hit that suppressed one of the rebels. The rebels were rather passive and even the fearsome foreign fighters decided to wait to see how the attack unfolds before they join the fight.
Team Celje managed to keep the steady rate of fire and scored another hit against Group Charles, slowly reducing their numbers.
Team Bled joined in the firefight against Group Charles, but contributed little more than just a sound.
Team Celje kept their fire going and scored another lethal hit against the same target.
In the mean time, team Ankaran surged to the other side of the house and opened fire at Group Brad, scoring a hit. The return fire from well entrenched rebels was devastating, leaving two soldiers suppressed! Luckily, SAF MMG team was well positioned and sprayed Group Arnold through the barricade, scoring a hit!
Further north, Group Duncan - lead by the infamous Yellow Jacket - took on the initiative and moved towards the orchard where Teams Bled and Celje are positioned. They opened fire at team Bled, hoping to aid their comrades of the Group Charles, suppressing two Slovenes and scoring a lethal shot on the SAW gunner. Judging by the recent events [Every single modern game I played so far], carrying a SAW brings a curse and a bullseye on you. The return fire of Slovenes was not effective.
Combat continued, bullets flew everywhere, but still - nobody was able to obtain any form of superiority.
Targeted by Group Brad, Team Ankaran suffered a heavily wounded, that had to be escorted to the back - but how, when the fire by the rebels is so heavy?
Things were going even worse for Team Bled, that lost another soldier to the rebels of the Group Duncan. Luckily, team Celje's aim was accurate and they scored two kills and a suppression on team Duncan - is the luck for the Slovenes starting to turn?
Apparently not, as Team Ankaran just lost three men, 4th being heavily wounded and waiting for extraction to medevac.
The success of whole assault in jeopardy, an M-84 tank was called in to intervene.
[Out of interest: In the next turn, the initiative was rolled as follows: 1-1; 5-5; 1-1; 6-6; 6-6 and finally 3-2 for the Rebels]
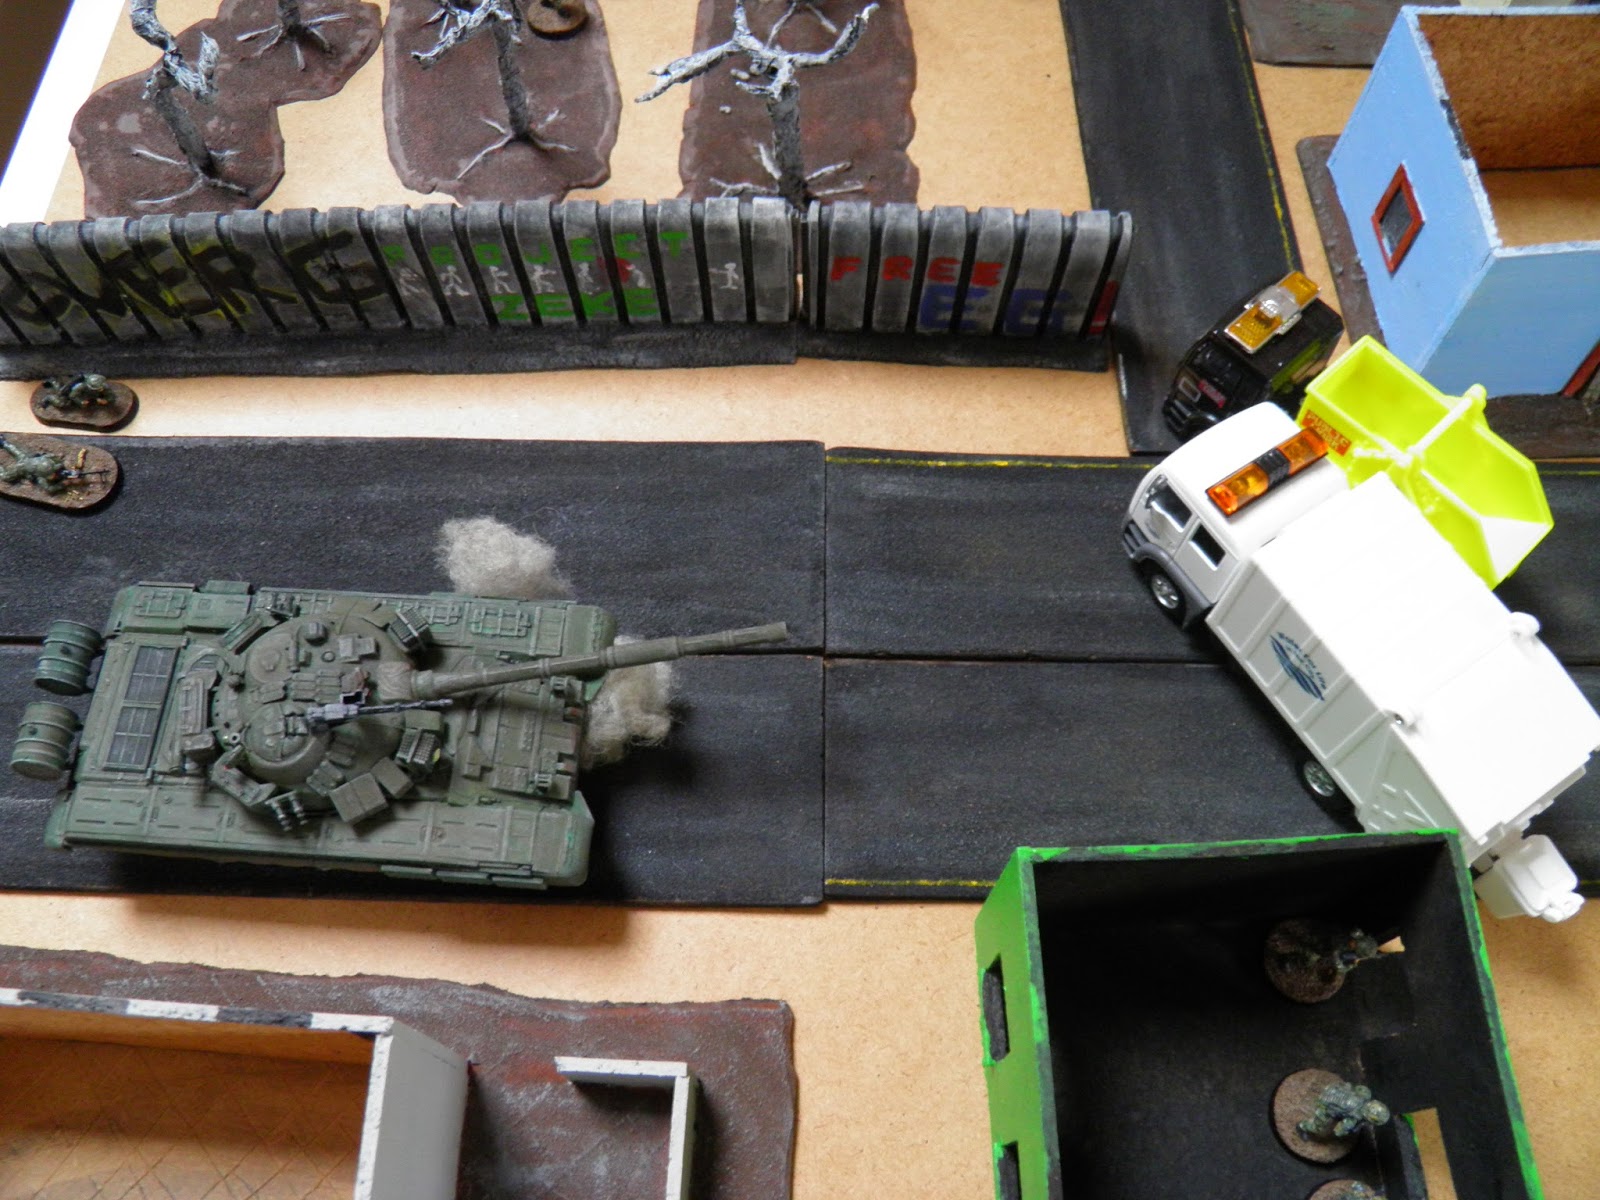
Cavalry arrived! Cautiously, an M-84 rolled down the street, stopped and opened fire at the Group Charles. Still respecting the ROE, it sprayed the house Group Charles has turned into a fort with HMG fire and has failed to leave an impact.
The arrival of the tank meant the foreigners better go in action, they tried hitting the tank with an RPG across the barricade. The rocket flew in the gap between the trucks and scored a hit, badly shaking the crew, but otherwise not damaging the tank.
Second shot was more accurate and exploded near the tank's main gun, destroying it. There goes the temptation to use the main gun!
SAF MMG team kept firing at Group Brad in an attempt to keep them away from the wounded mate. Up north Teams Bled and Celje were still exchanging fire with Group Duncan, killing one of theirs but losing another one of Bled's to a heavy injury.
To help evacuate bleeding member of the Team Ankaran, another team was been sent in - designated Team Drava. Joined by a combat medic, their mission is to stabilise the wounded and escort him back for medevac.
In the orchard, Team Celje eliminated Group Duncan and moved on to engage Group Charles. The rest of the battle was at a stalemate.
Medical team reached the wounded soldier and medic immediately started escorting him back to the casevac [Medic became a separate group in game]. The rest of the team divided their tasks, rifleman checked the barricade for explosives , but thankfully the rebels did not plan them [Lost another chance to use my EOD team in game!]. Team's SAW gunner and Grenadier opened fire at Group Brad and scoring 2 kills in their quest for vengeance.
Team Celje moved forward and engaged Group Charles, scoring two hits. This got them in the range of the sniper on top of the apartment blocks, but he failed to hit any of them. Team Bled retreated in the back to bring the wounded to the casevac.
As the medic was escorting the wounded member of team Ankaran to the back, the rest of his team opened fire at Group Brad, completely obliterating it, but was in turn suppressed by the rebel MMG team.
In the orchard, team Celje completely demolished Group Charles.
Foreign fighters' RPG gunner kept firing at the tank, scoring a good hit on the tracks and thus immobilising it. The assault will have to be carried out on the flanks of the barricade, after all!
Rebel sniper has managed to get a hit on team Celje's infantryman, who was saved by the armour plate.
Crew in M84, while immobilised, turned their attention to the foreigners and sprayed them with HMG fire, suppressing a rifleman and killing a RPG gunner [as per dice rolls! - but I later realised elite rebels can have more than one person suppressed.]
Dropping his friend at the casevac, Bled's team lone survivor caught up with Team Celje and attached himself to them.
With the RPG gone, M84 crew started firing at Rebel MMG on top of the market store, suppressing the gunner. Team Drava, the three man team that joined the fight with the medic, exchanged some fire with the Foreign fighters, but without any effect.
Out of targets, SAF MMG team pushed forward to engage from a closer range.
The sniper aimed was on point now, scoring a heavy wounded in team Celje!
After dropping wounded man at the casevac, medic returned to battle and was on his way to rejoin Team Drava. His team divided fire between MMG team and Group Arnold, suppressing two of the latter and killing one of the former.
The joy was short lived as rebel MMG sprayed them, causing a heavily wounded.
Team Celje split as wounded man was escorted to the back, while the rest of the team moved forward.
Accurate fire from rebel MMG suppressed SAF MMG team.
Team Celje engaged the sniper, suppresing him and in eventually killing him, while also engaging Foreign fighters. The assault was closing to an end.
In a subsequent fighting, M84 managed to destory the rebel MMG team and SAF MMG team moved forward, just to lose an assistant gunner to the Foreign fighters.
It was then just a matter of time, before the last of the rebels were destroyed and the battle was won.
Post game thoughts:
Initially, I imagined that the only way forward would be through barricade, but I am quite satisfied that I left the gaps open for infantry. Infantry can, after all, move rather freely.
I fed Slovenes a tank and an extra fire team, that I believe saved them from suffering a retreat. This isn't totally fair to rebels, that got no extra troops, but I did say the games would be rather biased. The idea was that this game was just a part of a larger battle, where
attack would not be started without a decent numerical superiority and
being surrounded, the rebels couldn't quite get relieved. Also, three mediocre SAF teams and a MMG team were up against three bad an an elite Rebel teams, supported by MMG team and a sniper. The worse problem than team composition is the unintentional fact that I think about what to do with my Slovenes and less so about what to do with the Rebels. To remedy this, I will try to shift my AARs into more story-like posts as who shot at whom makes for a rather dull read.
I am satisfied that I escorted all the heavily wounded soldiers to the back, as in the last game my wounded soldier was just waiting for the game to end.
Tank proved to be a rather fun addition. The rules are so simple, anything heavier than small arms and HMGs can penetrate the tank - so there is no difference between a RPG of this or that description. I simply used tank as a Medium tank, giving it a 3+ save. With my bad rolls, this made it rather vulnerable - as it should be. Bringing a tank in town is never really a good idea. Other than that, I think I had too many teams on board and I got lost in knowing who was activated and who was not (which is also due to fact I was not concentrated on the game, which is a side product of playing alone).
Furthermore, I made a bucket load of mistakes during the game. While the rules are really minimal, I kept realising I forgot about several things. Other than that, I am growing to like he system.
All summed up, at least I am continuing with the "campaign" and using my miniatures. I expect to play more games eventually, but have currently been struck by a painting mojo, so I am working on some of my other projects.
Thanks for looking,
Mathyoo
Showing posts with label Slovenian Army. Show all posts
20 Feb 2016
30 Jan 2016
Evergreen Fields: The rebels introduce themselves - AAR1
Downtown Evergreen, Evergreen Fields.
March, 2016.
As part of the International Intervention Force (IIF) a small contingent of Slovenes was sent to the island. After the contingent established a base just outside the capital, they started patrolling the streets to assess the security situation, get used to their new lives and to make them known to the local population.
SAF force size: A convoy of two humvees, armed with HMGs. Each carries one fire-team.
Enemy size: Contact not expected. Evergreen is firmly in governmental hands.
(But there are 4 groups of untrained militia, armed with AKs and an RPG) with an IED and a PK team.)
[Patrol has to follow main road through Evergreen. Unknown to the patrol, rebels have infiltrated this neighbourhood and are setting up an ambush. There are three IED markers on the road. On a roll of 1-2 the marker is real. If first one is fake, roll of 1-3 makes it real and so on. If it blows, it blows. If SAF troops manage to spot it, an IED team has to be called in. Ambushing troops will start their attack when the real IED detonates or based on a roll while patrol waits for the IED team]
As soon as the patrol entered the ambush zone, the gunner in the lead Humvee spotted something on the road, but it turns out it was only a pothole.
Moving on, gunner in the lead humvee spotted something again, but it turned to be false alarm again - we are deep in the friendly territory, after all.
Losing his edge after two false alarms, team in the lead Humvee failed to spot the real IED that detonated when they came close! While Humvee's armour is nothing to brag about, luckily, the vehicle only lost its mobility. The passengers were shook up, but other than that, nobody got hurt.
They got to their senses very fast. They had to call in someone to come pick them up and secure the area. The team in lead humvee disembarked, leaving a rifleman in the position of a HMG gunner on the vehicle and after slightly reparking their vehicle, second team did the same.
Meanwhile, the ambush has started, but only one rebel team, armed with six rifles, managed to get in contact and suppressed Team2's SAW gunner and the designated marksman!
Due to incoming fire, Team2 was unable react afterwards, while Team1 kept scanning their sector.
The incoming fire from the rebel team, now safe behind house walls, however, intensified and resulted in two more hits on the Team2. Gunner in Humvee was luckily just lightly wounded and would continue to fight, but the SAW gunner was in need of immediate medical attention and evacuation. SAF's return fire was less than accurate, but they did succeed in hitting one.
Patrol leader has called in for QRF, but unfortunately there can be no air support due to civilian casualties that it would cause!
The success made the rebels even more daring and they even hauled in a PK team in an immediate vicinity of the Team2, while a group of riflemen, lead by the notorious Yellow jacket started moving in from the north-east.
As if things weren't bad enough for Team2, a foreign fighter squad, armed with a RPG (the only one the ambushing forces have!) has started moving in from North-West!
The rebels, realising their advantages, pressed forward! Again the group in the house fired at Team2, but this time the hit they did was saved by armour. The return fire of Team2's HMG and designated marksman was, however, deadly and resulted in four dead.
The foreign fighters team moved up and took cover behind the small wall. They managed to put two rifles and an RPG in the LOS of their targets and fired at Team2. The RPG gunner aimed for the humvee and hit it. Lightly armoured vehicle had no chance against a direct hit and gunner had to bail. Luckily, he made it out in time and, cooperating with the designated marksman, returned fire. They managed to hit and suppress the gunner!
The Man in Yellow's group decided to rest a bit longer and 4th group of rebels still didn't make it to the scene!
Luckily for ambushed soldiers, a squad arrived in their support and with them, a medic that was desperately needed!
After the arrival of QRF, things have changed a bit for the ambushing rebels.
Concerned with the questions of life and death, the lone survivor of the group in house started to flee. With the SAF troops infront and behind them, foreign fighters stopped to rethink the situation, too. PK team was no different, still suppressed, they didn't do much.
Yellow jacket did not stand idle. He moved his group forward and managed to find a good firing position for 4 rifles. They've hit a SAW gunner (everyone targets those!), but failed to do any damage. Team1 was watching their sectors closely and a fire from the mounted .50 cal, SAW and 40mm grenades resulted in one rebel suppressed and one killed on the spot.
By now, the last ambushing group managed to reach the scene as well and they, too spawned up north.
Team1 came back with the vengence and after slightly repositioning of the patrol leader, they opened fire, that resulted in 2 dead.
Team2, still affected by the shock, did not do much but wait and try to regroup.
QRF's Team3 and Team4 also took some time to rethink the situation. Experiencing the first real fire fight was heavy on their nerves.
Few moments later, ambushed teams, Team1 and 2 are still not acting, but QRF's leader and his Team3 moved in to regroup with ambushed team and stabilise the hit SAW gunner. Moving his team's SAW and grenadier to the corner of the house, they opened fire at the rebel group out in the open that was planning on closing in with Team2 and beating it in a close combat! Unfortunately, their fire served little more than making noise. Who gave them these peashooters!?
Team4 did little better and still sat in cover.
Rebellion's sole survivor, this time enraged by the loss of his friends, turned back and took the fight to the enemy. Running back towards Team4, he took cover behind a car and threw a grenade infront of Team4 leader! Luckily for the Slovenes, his hands were shaking of adrenaline and he missed. Unlucky for him - they didn't miss.
Afraid that they might get outflanked, foreign fighters group took cover behind yard walls and divided its fire between Team2 on the road and Team3 lurking around the corner. Foreign fighters have a fearsome reputation - and for a good reason! They scored two hits on Team2, but they had no effect in the end. Against Team3, they scored three hits - two on SAW gunner and one on the grenadier. Their vests proved useless and if the grenadier was lucky enough to just be lightly wounded, SAW gunner was hit too bad even for the team's medic to help him.
Rebel HMG team gathered courage again and fired a burst, scoring two hits. One for no effect on the marksman and the other as a light wound on the Team2's rifleman. This time, Team2's return fire resulted in assistant gunner being suppressed.
Rebel group just next to HMG team was apparently startled by the inaccurate fire of Team3 enough to wait a bit with their advance.
Yellow jacket's group, horrified by the SAF fire, hunkered down in their cover, too.
Being a bit more optimistic after the arrival of QRF, Team1 opened fire at Yellow jacket again, to try and carry the initiative and end the battle. Their fire completely erased the enemy.
Team 2 failed to regroup and remained in their position without trying to obtain a fire superiority or pretty much do anything else.
After losing their SAW gunner, Team3 rearranged their position a bit and fired at the same target again, this time with a grenadier and the team leader, while medic remained in cover. They barely managed to suppress one of the rebels and hopefully delay the assault for some more time!
Shocked by their first contact, Team 4 stopped to regroup.
Having lost two whole groups, rebels were a bit tense. They were desperate for at least some prisoners, if not a full blown victory! Their HMG team, however, did not plan on playing part in that plan just yet. Blood thirsty foreign fighters were more zealous and moved in towards the assault. Firing on the go, they scored two hits, that both ended in KIA! With team leader and rifleman dead and marksman suppressed, badly injured SAW gunner did his best to stop the incoming assualt. Due to his injuries, he was unable to put down accurate fire and didn't hit anyone.
[While rules specifically state that ISAF troops have grenades, it doesnt say so for the Taliban. As these are just random militia, I decided against it.]
Rebel group at the building did not move, even by the remarkable show of courage by the foreigners.
SAF Team1, seeing the danger that Team2 was in, turned around and engaged the incoming foreigner fighters. Hitting them with grenades, SAW and HMG fire, they managed to kill 4 and suppress one fighter, stopping the assault dead in its tracks. Adding salt to the wound, Team3 managed to score another kill on the foreign fighters' group, reducing it to a sole survivor.
Team4 finally pressed forward and opened fire on the last remaining large rebel group. Firing very far, they scored 2 hits, downing two rebels.
Foreign fighter's lone survivor was determined to carry on with the assault and continued closing in with the remained of the Team2, but failed to do anything else. The rest of the rebels, shaken by seeing the elite foreigners [they were no different than anyone else game rules wise in this game], they needed some time to regroup.
Foreigner now moved even closer to the suppressed marksman of Team2 and engaged in close combat. The fight didn't last long before the suppressed and disoriented marksman fell to the attacker.
Even with the success of the foreign fighter, the HMG team refused to take any part in the fight. Rebel group, now down to two thirds of its starting size, however, moved in to join in the assault.
Taking no interest in the badly wounded SAW gunner, they opened fire on Team1 that was right in front of them. They suppressed the team leader and in return, suffered 2 dead and one suppressed.
Still, the fire was fierce enough to prevent Team1 from taking the initiative and proceed with the assault of their own. Desperate to save what can be saved, SAW gunner of Team2 opened fire with his minigun again, scoring one hit. Team3 and 4 did not react.
The foreign fighter didn't however, and continued with his assault, this time against Team1. The fight ended in a draw. Lone survivor of the once mighty rebel group has hit the dirt and didn't move.
Rebel HMG team, now desperate to make a contribution, fired a burst in the melee. They failed to hit anyone.
[There are no rules for shooting in melee, so I just randomly allocated hits between SAF and the rebel]
The melee continued without result, so the Team1 SAW gunner moved in to help, while gunner in Humvee opened up at the other rebel. Melee was still ongoing, but fire from the HMG was accurate enough to down the last rebel in the group that joined the fight last.
Team3 ran towards the HMG to engage it and Team4 just stood there once again.
Rebel HMG opened fire again and hit one of the Slovenes, grazing him.
Finally, the melee was won by SAF troops and foreign fighter was downed.
Team1 abandoned the immobilised humvee and took cover by the destroyed one to open fire at Rebel HMG team, destroying it and with it, the ambush force.
Post-game thoughts:
In their first encounter of the Evergreen Fields campaign, SAF suffered four killed in action, one heavily wounded and some light casualties. They also lost two humvees!
Rebels made a great show at start and had most of the high rolls. Apart from QRF arrival (roll of 6 first round after ambush, 5+ for the rest), SAF only had high roles for injuries, losing 4 soldiers. I was genuinely concerned at start that ambushed teams won't hold out. It is a very bloody game.
I am not sure about the size of my QRF, it doubled the amount of Slovenes on the table. On the other hand, anything else would be just too small in size. I wish I had an armoured transporter for QRF, as my humvees were busy. In the end I opted for foot entry.
Well, what I changed from test game is that my soldiers were just trained as opposed to veteran from the last game. This made them hit on 5+ instead of 4+ and activate on 4+. In comparison, rebels were of worst quality. Very motivated, they also activate on 4+, but they hit on 6+. They always hit on 6+, but because SAF hit on 5+ and rebels are usually in cover, they hit on 6+ as well. This means, they are there-there by quality and I had 8 guys against 24 + a machine gun team.
I cheated a bit and forgot to give rebels a chance to be suppressed instead of killed in first hitting session, but I redeemed myself when HMG team was hit!
I think I kept forgetting that activated teams do NOT return fire, which is something I should work on.
Using casualty chart only for SAF helps with micromanaging, but it might be slightly unfair that a downed SAF can come back as lightly injured guy without any pentaly. Perhaps a -1 to experience would help (so he'd hit on 6 instead of 5 etc). The problem is, I'd probably keep forgetting about it!
Another option is, light casualties, if a casualty again, would suffer a +1 modifier, to up their chances of becoming a higher tier casualty after the initial light wound. It took me a long time to see a heavy casualty can actually operate, but at -2 - so my SAW gunner could fire his weapon. I used this when I remembered about it.
With Slovenes, I had no luck as far as Team2 goes. I needed a roll of 6 to activate and remove suppression tokens (4+ and 2 for each suppressed, then 5 but even that didn't help). My worst mistake was presuming 1 foreign fighter is not a threat. By letting him live I did remove some of the fighters in the larger group, but didn't stop the bloody assault.
All in all, I think I will stick with FUBAR instead of Breaking news. I considered both sets for this game, but as I have to re-learn rules every time I play, I simply went with the shorter ones. The only thing I have trouble getting used to is how RPG is basically same as a machine gun (3 dice to hit), and there is nothing to differentiate one from another. Which isn't necessarily bad, if you consider the weight of fire and all. How different can things be, using D6, after all?
Thanks for reading,
Mathyoo
25 Dec 2015
Underfire miniatures: 28mm East Germans team 4
Hi guys,
I would like to wish everyone happy holidays, and - assuming my posting trend continues - a happy new year, too.
In December, I painted up 4th team of East Germans, which is something like a command pack with assorted figures. It includes two leaders of some description (one even has a personal radio, which surprised me and made me wish there was a proper radio man, too!), another RPG and asniper designated marksman. As you would expect, I am not quite satisfied with my paintjob, but all in all it isn't too bad.
I honestly tried making better photos, but it appears the more I try the worse they get.
I have 16 now that would make up two squads. That's more than enough to fill the tiny 3x4 table I game on. I will mainly use them in my moderns campaign as the organised bad guys, assisted by the rebels I've been using so far. I got some ideas for the campaign in my head already, but I'll probably play a few random games until I'm satisfied with the rules and while I insist on keeping the games free of politics, I think some sort of background would still be in order.
Thanks for looking,
Mathyoo
I would like to wish everyone happy holidays, and - assuming my posting trend continues - a happy new year, too.
In December, I painted up 4th team of East Germans, which is something like a command pack with assorted figures. It includes two leaders of some description (one even has a personal radio, which surprised me and made me wish there was a proper radio man, too!), another RPG and a
I honestly tried making better photos, but it appears the more I try the worse they get.
I have 16 now that would make up two squads. That's more than enough to fill the tiny 3x4 table I game on. I will mainly use them in my moderns campaign as the organised bad guys, assisted by the rebels I've been using so far. I got some ideas for the campaign in my head already, but I'll probably play a few random games until I'm satisfied with the rules and while I insist on keeping the games free of politics, I think some sort of background would still be in order.
Thanks for looking,
Mathyoo
30 Nov 2015
Underfire miniatures: 28mm East Germans team 3
Hi guys,
I barely caught my November post (could you imagine I once had plans to post twice every week?) with another pack of Underfire miniatures East Germans. I had them on my paint table for about a month or so, sitting half done waiting for me to sit down and finish them. The camouflage is really a bugger and I think I am getting sloppier, but even with a bit of a drop in quality, the result is really worth it. I need to go invest in another tiny brush so next pack I do can be even better.
Without further ado, I present you team 3. It includes 3 East-German-AK guys and an RPG gunner, which I really missed in the earlier packs. For some reason, I really like backpacks on my guys and I plan on revisiting my RPG armed rebels and adding them some rocket packs.
I apologise for crappy photos, but at least they are no worse than usual. You can see they all carry their bags, including the RPG gunner! There are two things I miss with these packs, however. One is the RPG team assistant with extra rockets, the second more RPKs!
Here is a nice video I stumbled upon while searching NVA troops. It is just one part of many and it is about the breach. It shows you just how little things have changed from WW1 as they charge cross open ground, albeit with the tank support.
Thanks for looking,
Math-yoo
24 Oct 2015
FUBAR Afghanistan test game
Hello guys,
Last month or so, I found new set of free rules for modern games. Now, there are some great ideas in Breaking news, but I got lost in all my additions (that were never written down), plus they aren't quite finished, so they proved problematic often.
I decided to give FUBAR, one page rules, a try. I am using the Afghanistan supplement and I opted to use some of the alternate morale rules (just casualty chart for first game). As if this weren't enough, I also decided to play a scenario from their Afghanistan missions that includes civilians. Because...well, it sounds like it should be plenty fun!
FUBAR core rules, 4th edition
FUBAR alternate morale rules
FUBAR Afghanistan supplement
FUBAR Afghanistan missions
I decided to play the Stopping the IEDs - airlifted assault mission. Not that it sounds great because it's a helicopter assault (curb your enthusiasm, no helicopters will be on the table), but it's a great chance to show of my new houses.
As this is my first game, I used points guidelines from Afghanistan missions sheet. I opted for:
Two "type 2" squads, and I added a squad leader.
No EOD support can be called in, because this is an airlifted assault.
Four "tier 3" insurgents groups. Rules say group is 6 fighters with AKs, that get a RPG on a roll of 4. I also gave them a RPK on a roll of 4, meaning best armed groups have 4 AKs, a RPK and a RPG. This is what they got:
Group 1 5x AK, RPG
Group 2 5x AK, RPK
Group 3 5x AK, RPG
Group 4 5x AK, RPK
It turned out them and another AK, RPK and RPG are all the insurgents I have, which made me realise the East Germans I've been painting will have to represent a higher tier bad guys in eventual campaign.
This was deployment. You can see two SAF teams on the left, Rebel team by the grey building and another one having a rest at the hay rack. The rest are out patrolling and should return soon, surely they heard the Cougars bringing in the troops? As they are just local villagers, defending the factory, their cohesion distance is "touching". There are also 7 civilians standing around randomly, being annoying. Washers represent IEDs and were put in what I consider "fair" positions, on the roads leading inside the village, regardless of SAF position.
The barn is a store, inconspicuous small yellow-ish house is the factory.
Turn 1
Storming the village, team Ankaran moved in to secure the barn right away. Lacking UAV support, they were unable to identify rebels for combatants, but the rebels opened up right away to try and keep the SAF from the bomb store. They fire resulted in two SAF soldiers suppressed. A return fire from an UGL, Minimi and squad leader's rifle resulted in a rebel suppressed and one casualty (a RPK gunner, even!)
Seeing the action, team Bled rushed forward and opened fire on the rebel team hiding behind the wall. This time, I did not forget to count in the civilian (shooting 5" around it might get him killed, I forgot about him first time round, so I decided to ignore him). As any role of 1 around civilian gets him killed, he died.
Receiving all that fire, rebel team in the firefight failed to do much but react to the attackers! Sounds of casualties must have scared the other rebel team as well, as they decided not to react just yet. (Both failed activation tests)
Turn 2
Hay rack group activates and opens up with all they had and succeeds in suppressing two more soldiers and killing 2 civilians.
The weight of fire stops SAF assault in their tracks (they don't activate).
Turn 3
Team Ankaran is still being held by the fire, but team Bled surges forward. This time I remembered to use cover modifiers against rebels (SAF don't get cover modifiers because rebels hit on 6 as it is, I think I will use Breaking News' idea here that downgrades the rate of fire in cases like this. Just because rebels are bad at firing, it doesn't mean cover is useless all of the sudden). They score 3 hits and mop up with the Taliban team.
*At this point I realised I played it all wrong. Rebels can have 1 man suppressed, the rest all die outright. So I removed 1 that shouldn't be suppressed, leaving 3 rebels that were removed as a result of Bled's fire.
The defeat of one rebel team left the one at the hay rack paralysed, unable to perform. The two groups that were out on patrol, however, now returned to the village.
Turn 4
Only one rebel group activates, that moved on to the grey building, trying to prevent SAF from entering the bomb store. They were spotted by team Ankaran, but because only a suppressed rifleman saw them, they took no action.
Team Ankaran finally recovered and moved in the barn. Target was confirmed and explosives were set. Objective completed.
Team Bled moved forward through the building and engaged rebel group hiding behind the hay rack, who returned fire. Bled scored 5 hits, one becoming a suppression, 4 are kills. This is too easy, I must be doing something wrong!
Turn 5
Rebels won the initiative and one of the groups moved in through the grey building and its members took the best advantage of the single window and an outside space they could. They fired at the team Ankaran, but scored no success.
Seeing their friends at hay rack in despair, second rebel group sprinted to the hay rack, to take on the team Bled once they get a chance.
Team Ankaran repositioned slightly to get another man to fire and scored two hits on the rebel group hiding in grey house, killing one.
Team Bled failed to activate.
Turn 6
Team Ankaran moved up to the Rebels and engaged with hand grenades, erasing the rebel group quite literally.
Team Bled failed to activate again, as did both rebel teams.
Turn 7
Team Ankaran pushed forward once again and was met up with a fire from both rebel groups. Firefight with a larger group didn't go well for Slovenes, they ended suppressing one of the rebels and had 3 guys suppressed and a minimi gunner lost themselves. Fire from a rebel in the second group had no effect.
Team Bravo failed to activate.
Now one-man rebel group that started this fight at the hay rack fired at team Ankaran, scoring a hit, that was saved by a body armour. Whew!
Larger group didn't activate.
Turn 8
Small rebel group didn't activate.
Team Ankaran didn't activate.
Large rebel group activated and fired at helpless soldiers of team Ankaran (I was maximising the casualties here, because Ankaran was an easy pray, while Bled had all its members up and was on overwatch). The only hit they did put the Squad leader out of action, making him seriously injured (needs to be taken to off the table to the medevac).
My only hopes to ending this battle quickly, activating team Bled, failed.
Turn 9
Large group activated again and unleashed another volley at team Ankaran, trying to destroy it before its members can return to fight. They scored one hit. The save failed, which means one of the suppressed members is now a casualty. Random roll decided it was Grenadier who is now badly injured and in the need of medevac.
Small group failed to activate again.
Against all odds, team Ankaran returned to fight and opened fire, scoring a hit and suppressing one of the rebels.
Team Bled still didn't activate.
Turn 10
Team Ankaran activates (I realised their roll is 3+, not 4+, so that's another mistake), fires and kills a rebel.
Team Bled finally activates and moves out in the open to end this dispute. They spotted an IED marker, which turned out to be false. Their grenades scored 7 hits, which means they were now the only survivors.
According to the victory points, assuming SAF blew up the second building after the battle, as there was no opposition, it came down to:
SAF
10 obj + 48 rebels - whatever a civilian would be worth, so we'll ignore those = 58
Rebels
18 for 3 SAF members killed/badly injured
That's quite a victory for SAF and it does seem in line with what I've read about these engagements, so far, but I have done some mistakes. The system probably isn't bad, but I think I prefer some of the ideas in Breaking News (especially low ammo rules). I also think I would like to add something like an off table sniper support and bombardments, but as we were fighting on such short distances, the latter would not be used too often. What bothers me is that UGL, minimi and RPG all get +3 FP, compared to rifle's 2, but then again, that is 50% higher fire power. There is absolutely no difference between a RPK and a RPG, so perhaps I'd make RPGs ignore cover.
House roles ideas that I had during the game/deployment:
1. In AFG Supplement, there is a bonus for SUSAT optics (4x sight that Brits use). I only made one guy per squad (1/2 per team if you prefer) using it in a role of a designated marksman, so I opted to only give him the bonus.
Should you be interested, as everyone else, SAF figured marksman needs something heavier than a 5.56 rifle with a scope, so some of our units are now equipping their marksmen (that is not a sniper, we got those, too) with spare M76 sniper rifles (ie. Dragunov).
2. IEDs - For 3 teams that Taliban (so rebels in my games) have, they get an IED. Each has 3 markers (2 blanks, 1 real). If a marker is real, it will be decided by rolling 1-2 on a D6 (instead of picking one and not telling myself).
3. On guard/overwatch enables inactive teams to react to enemy fire and movement. I decided troops start on guard, as this would kind of make sense, the distances are short enough to imagine rebels expected the assault on the village.
4. I think advance casualties should work for both sides, as there is 1/3 chance of a light wound, which would give rebels some kind of a "save", they get none other way and are pretty much obliterated by the veteran infantry.
5. Talking about veteran infantry, SAF will be downgraded to "Seasoned" as we're assuming Evergreen campaign is their first real FUBAR since 1991.
Thanks for looking,
Mathyoo
Subscribe to:
Posts (Atom)